WikiHouse
WikiHouse assembly
Ground floor
Once your specified foundation has been installed, the sole plates are fixed, and everything is perfectly level, you're ready to assembly the Skylark chassis.
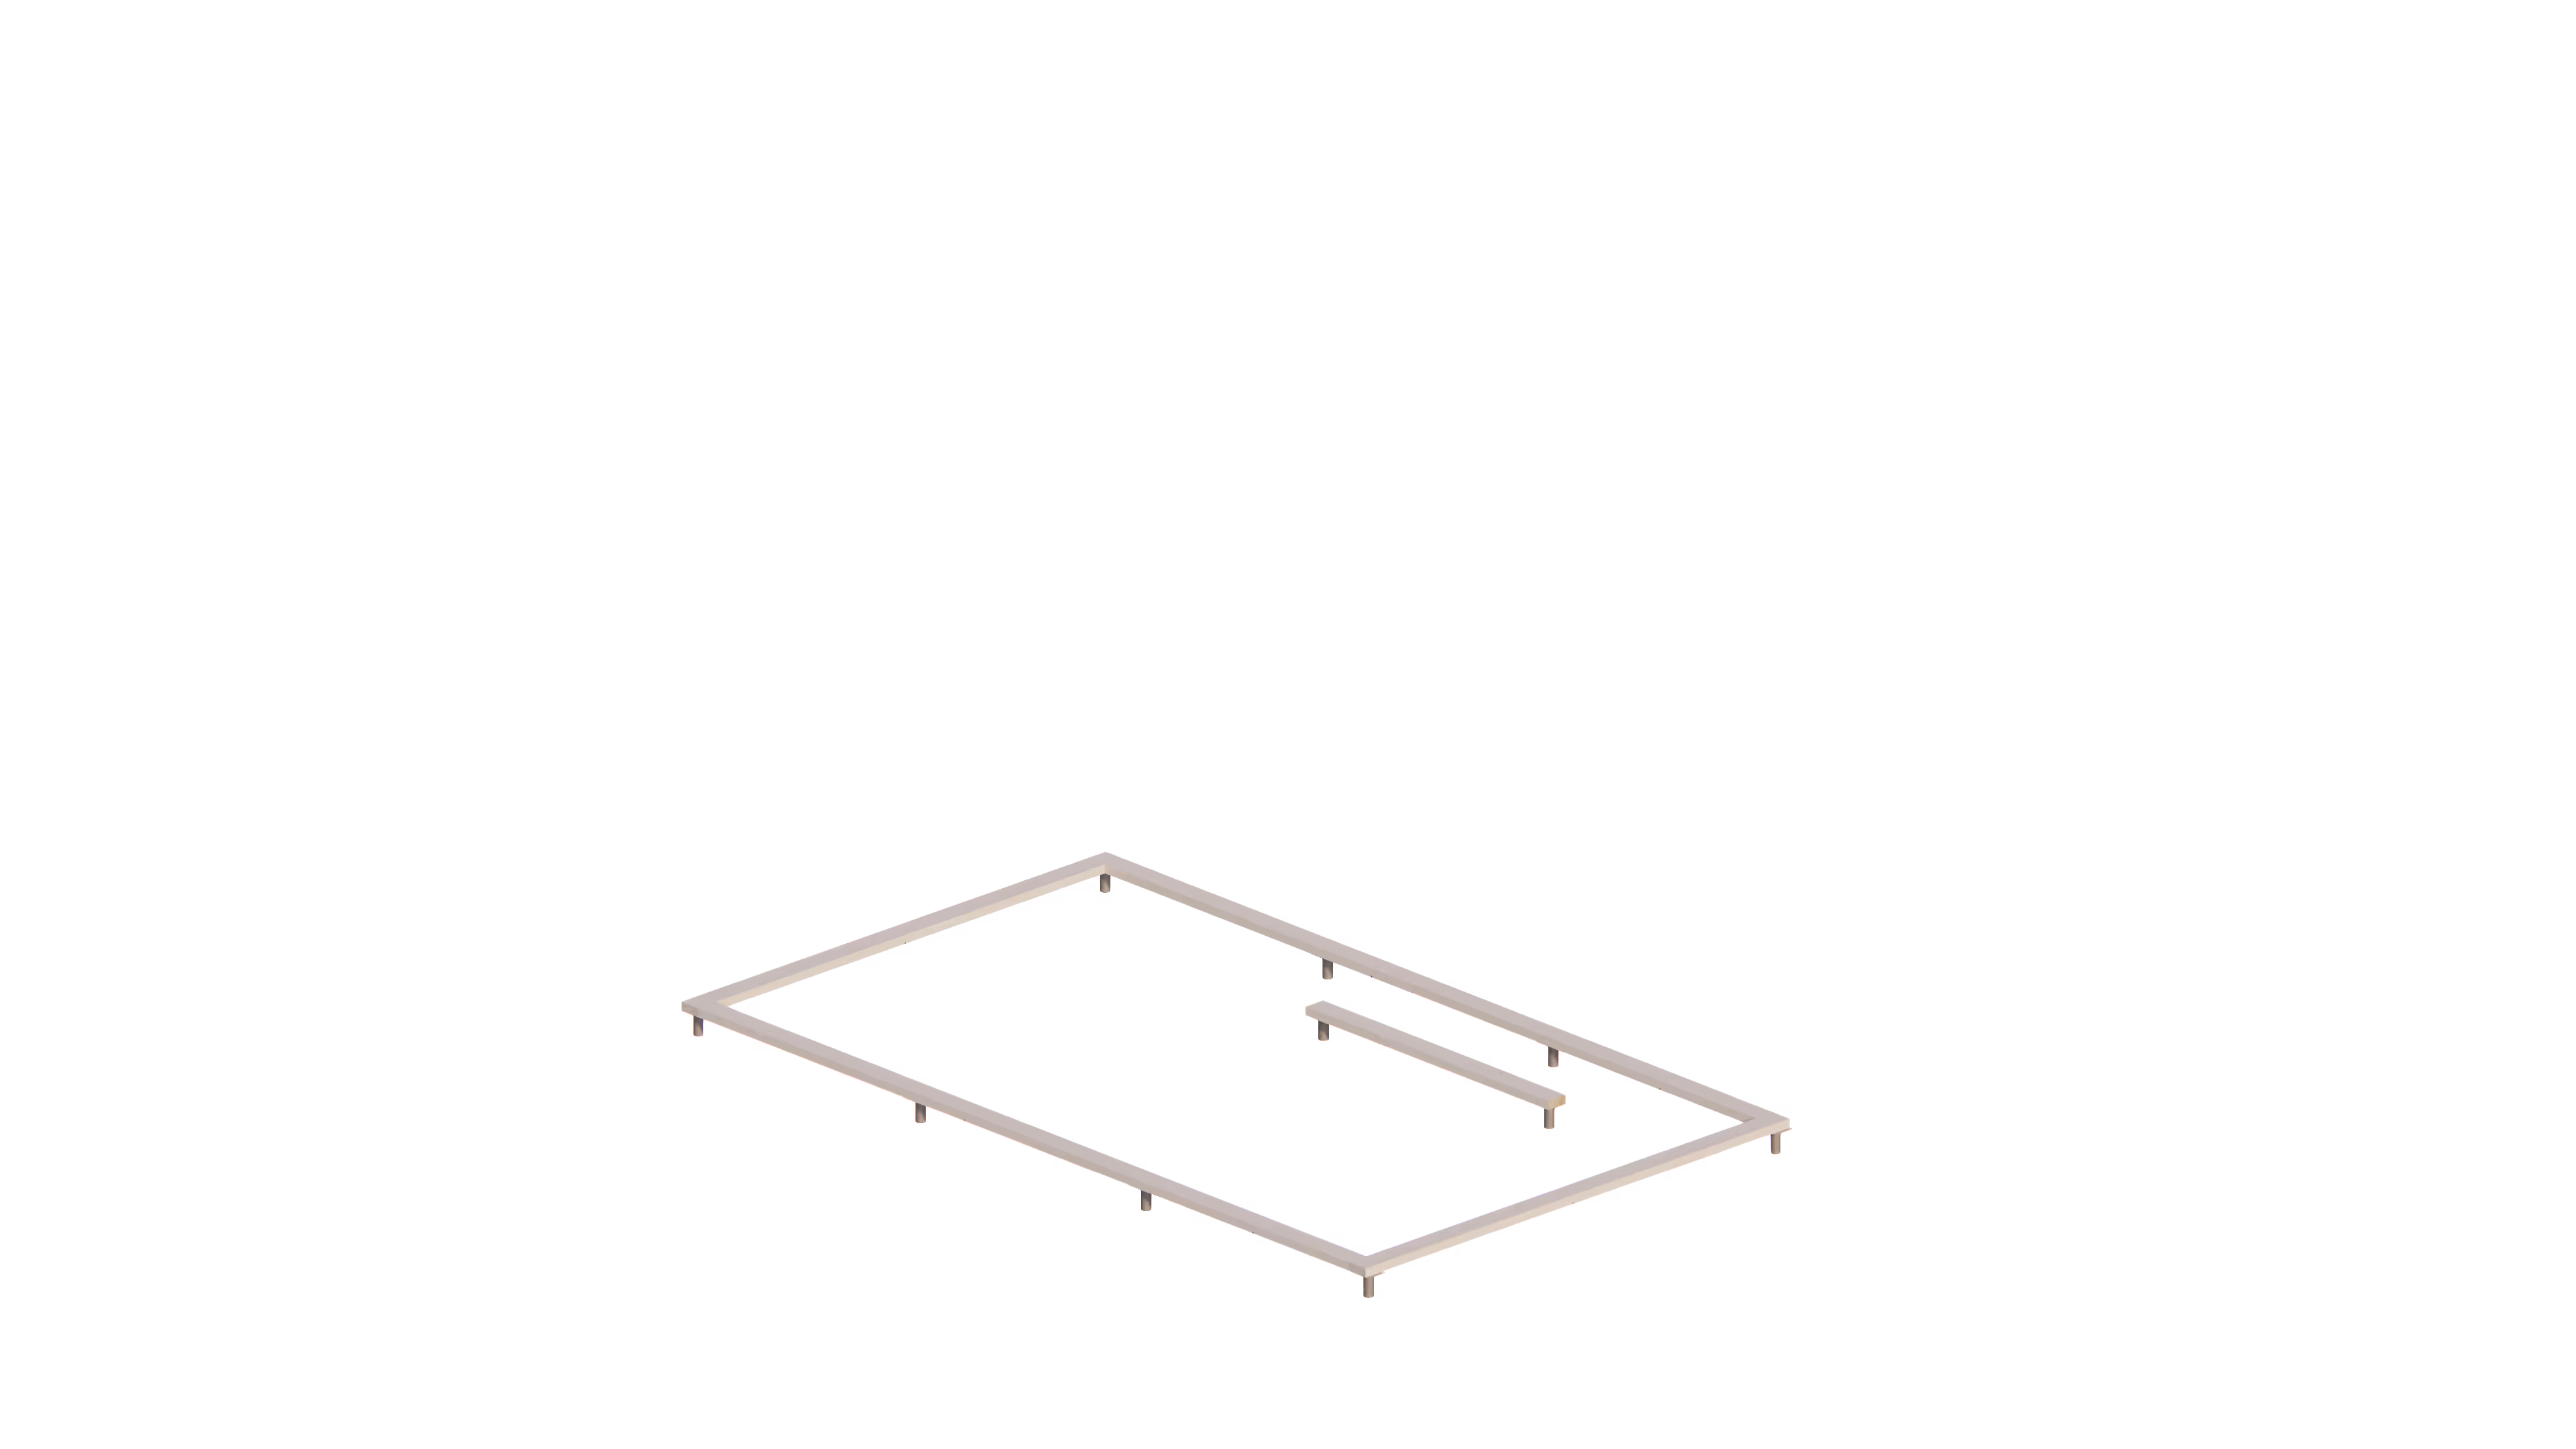
Soleplates
Sole plates, or ‘rails’, are typically solid timber beams that form a base structure between the foundation system and the WikiHouse chassis superstructure. These are generally structural graded softwood bearers (for instance C24 in the UK) and located around the perimeter of the building and underneath any load-bearing internal cross-walls. There are notches in the underside of FLOOR-0 and END-0 beams to accommodate a 250x150mm sole plate in the Skylark250 series, and a 200x100mm sole plate in Skylark200 series. In more extreme applications, structural engineers may specify glulam or even steel sole plates to support the chassis superstructure.
It’s helpful for sole plates to allow for some tolerance horizontally across the building. When bolting sole plates to the foundation system, we suggest drilling wider elliptical holes that allow for some degree of horizontal movement in the sole plates whilst laying out the floor beams, before securely fastening the bolts once you know the base of the chassis fits.
The WikiHouse blocks are then typically fixed to the sole plates using screws through the vertical end panels of the FLOOR beams and directly into the sole plates. In some cases it may be necessary to use steel angle brackets, such as those supplied by Rothoblaas, and secured with screw or bolt fixings. Your structural engineer should provide fixing details specific to your project and design.
Concrete floor
If you are building directly onto a concrete slab (without a WikiHouse timber floor) then you will still need to use soleplates to connect the WikiHouse WALL blocks to the concrete foundations. As with any other foundation type, the soleplates are laid out under the loadbearing walls, and typically use concrete anchor bolts to fix these to the slab. The precise specification of these bolts and the spacing between them will need to be provided by the structural engineer.
Again, it’s important that sole plates allow for some tolerance horizontally across the building. When bolting sole plates to the slab, we suggest drilling wider elliptical holes that allow for some degree of horizontal movement in the sole plates while laying out the WALL blocks, before securely fastening the bolts once you’ve checked that everything fits.
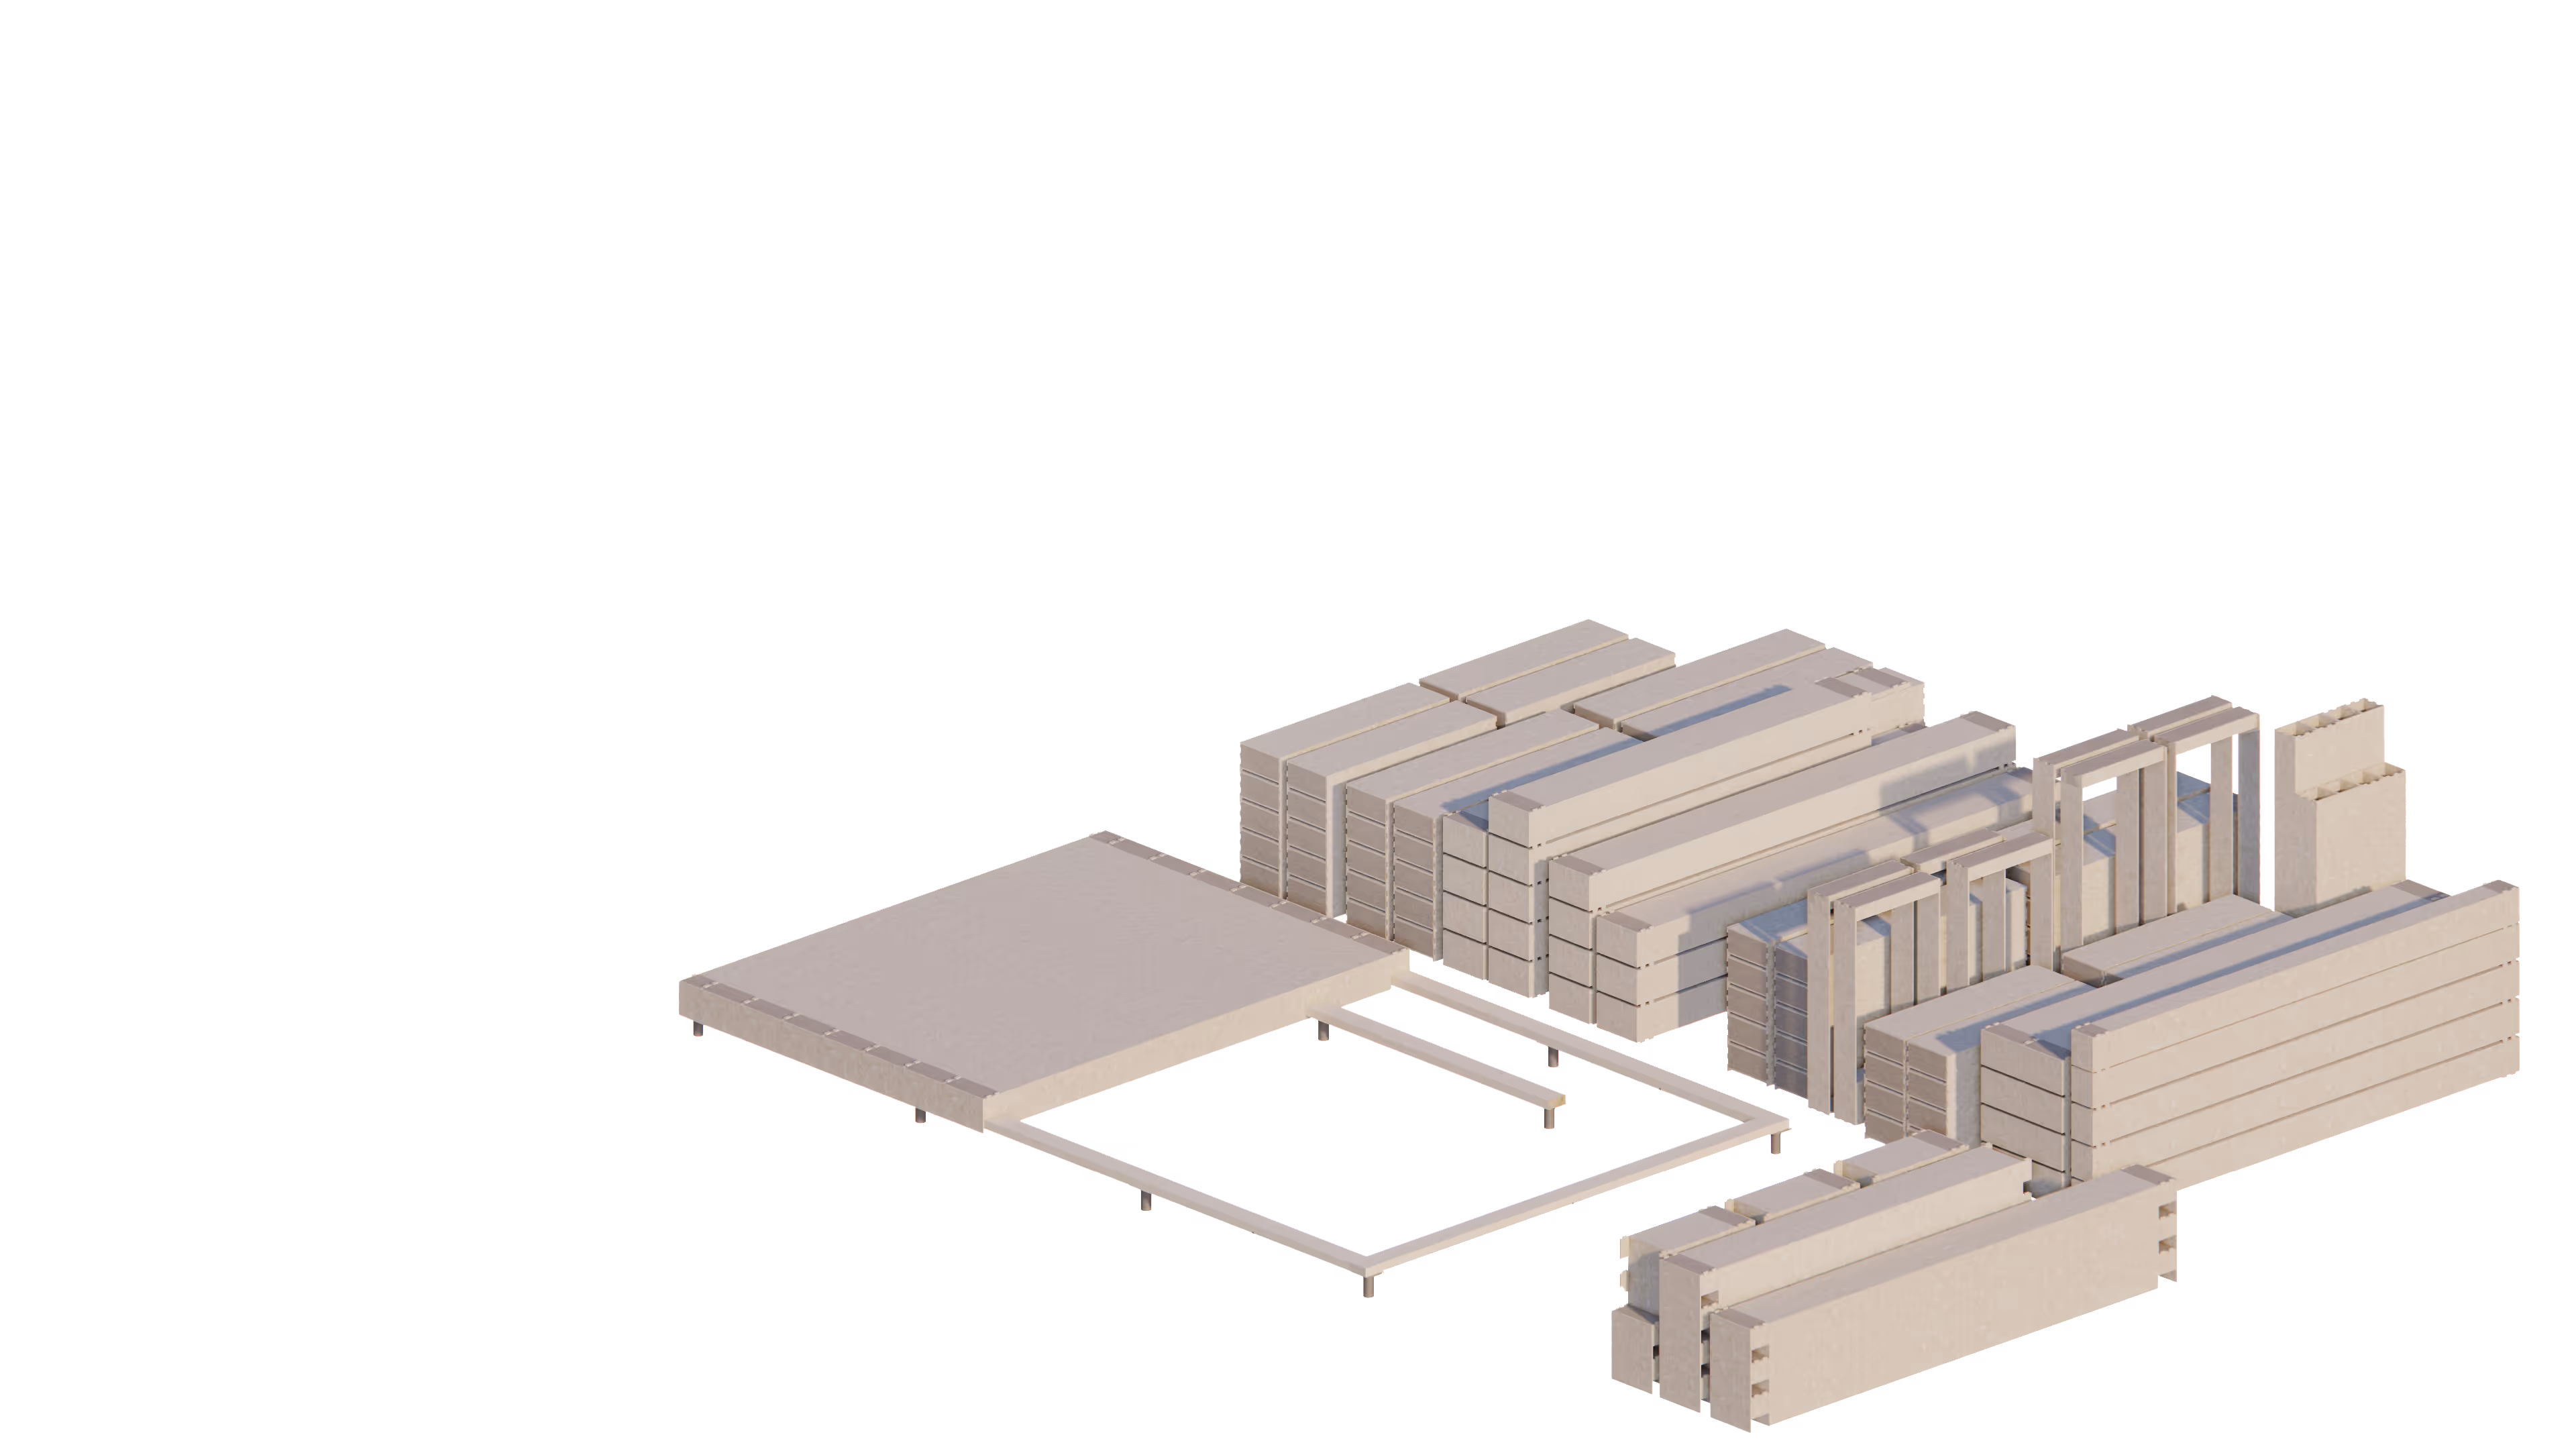
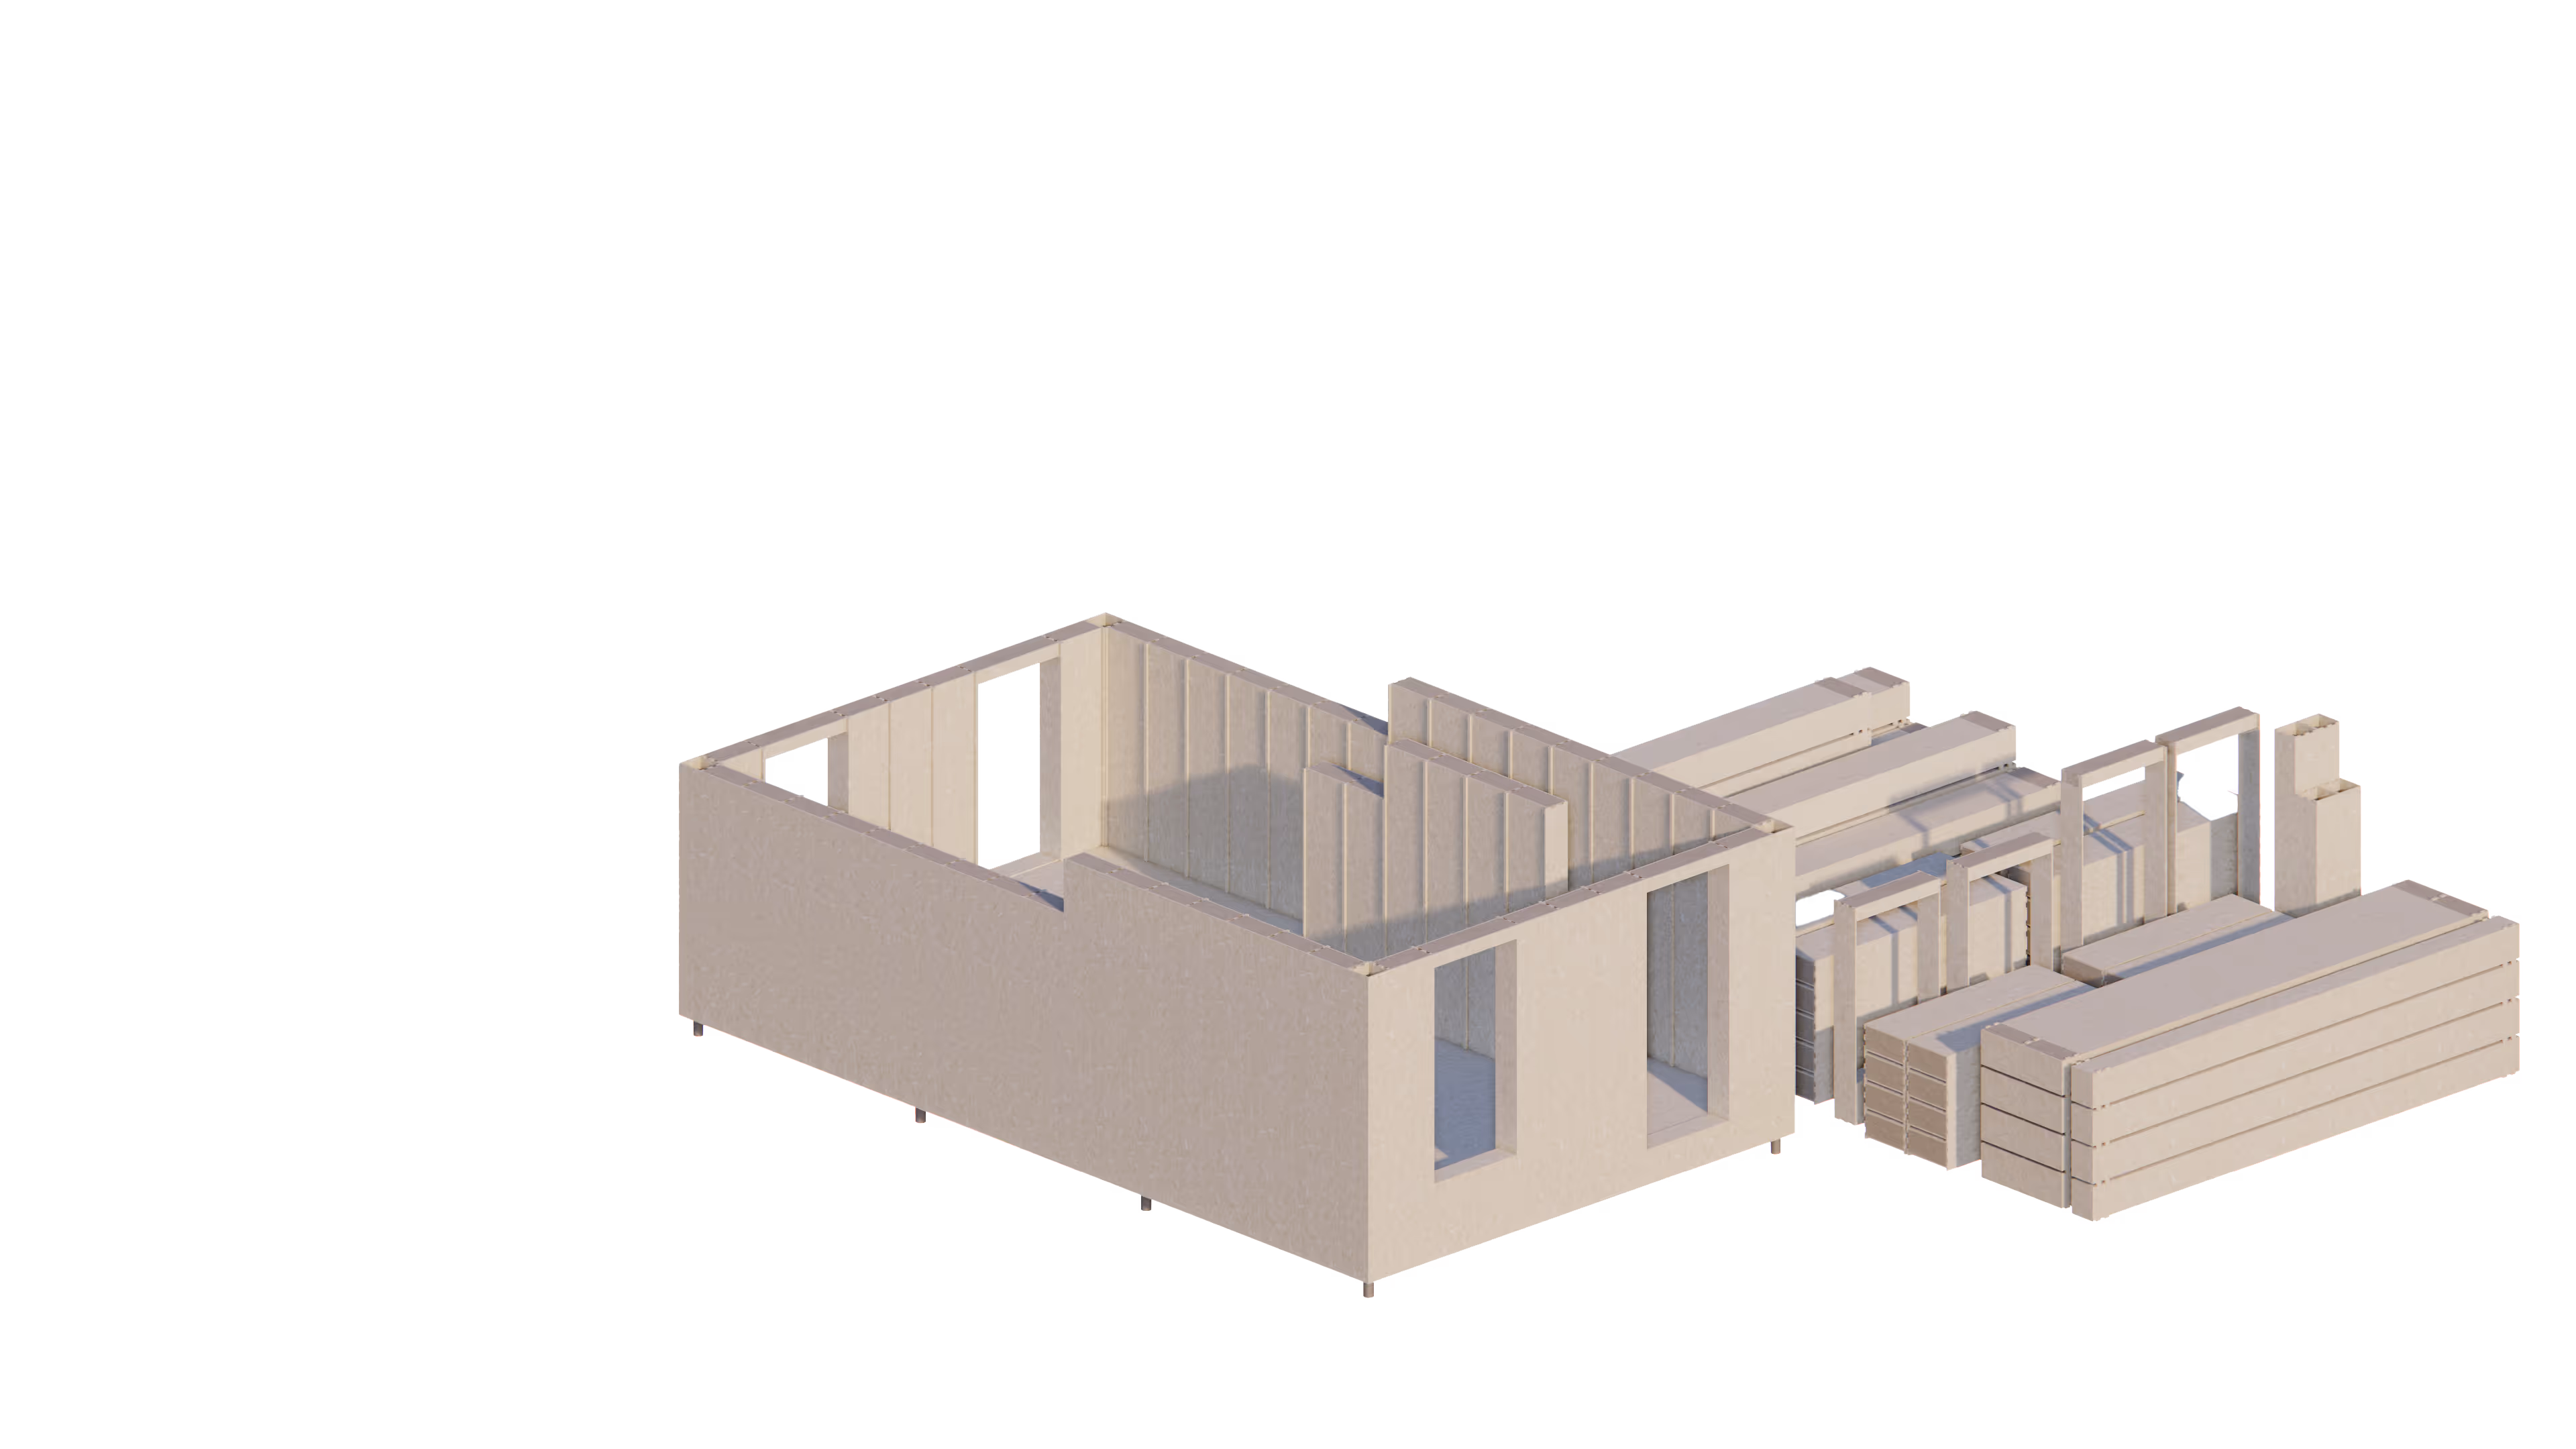
END blocks
Once you have the sole plates installed and accurately positioned (best check with a tape measure and ideally laser level), you're ready to install the END blocks. END blocks typically come in 600mm long sections that make up a full span beam, which corresponds with the span of the FLOOR blocks. These get dropped into place over the sole plates at either ends of the foundations, with a few taps of a rubber mallet.
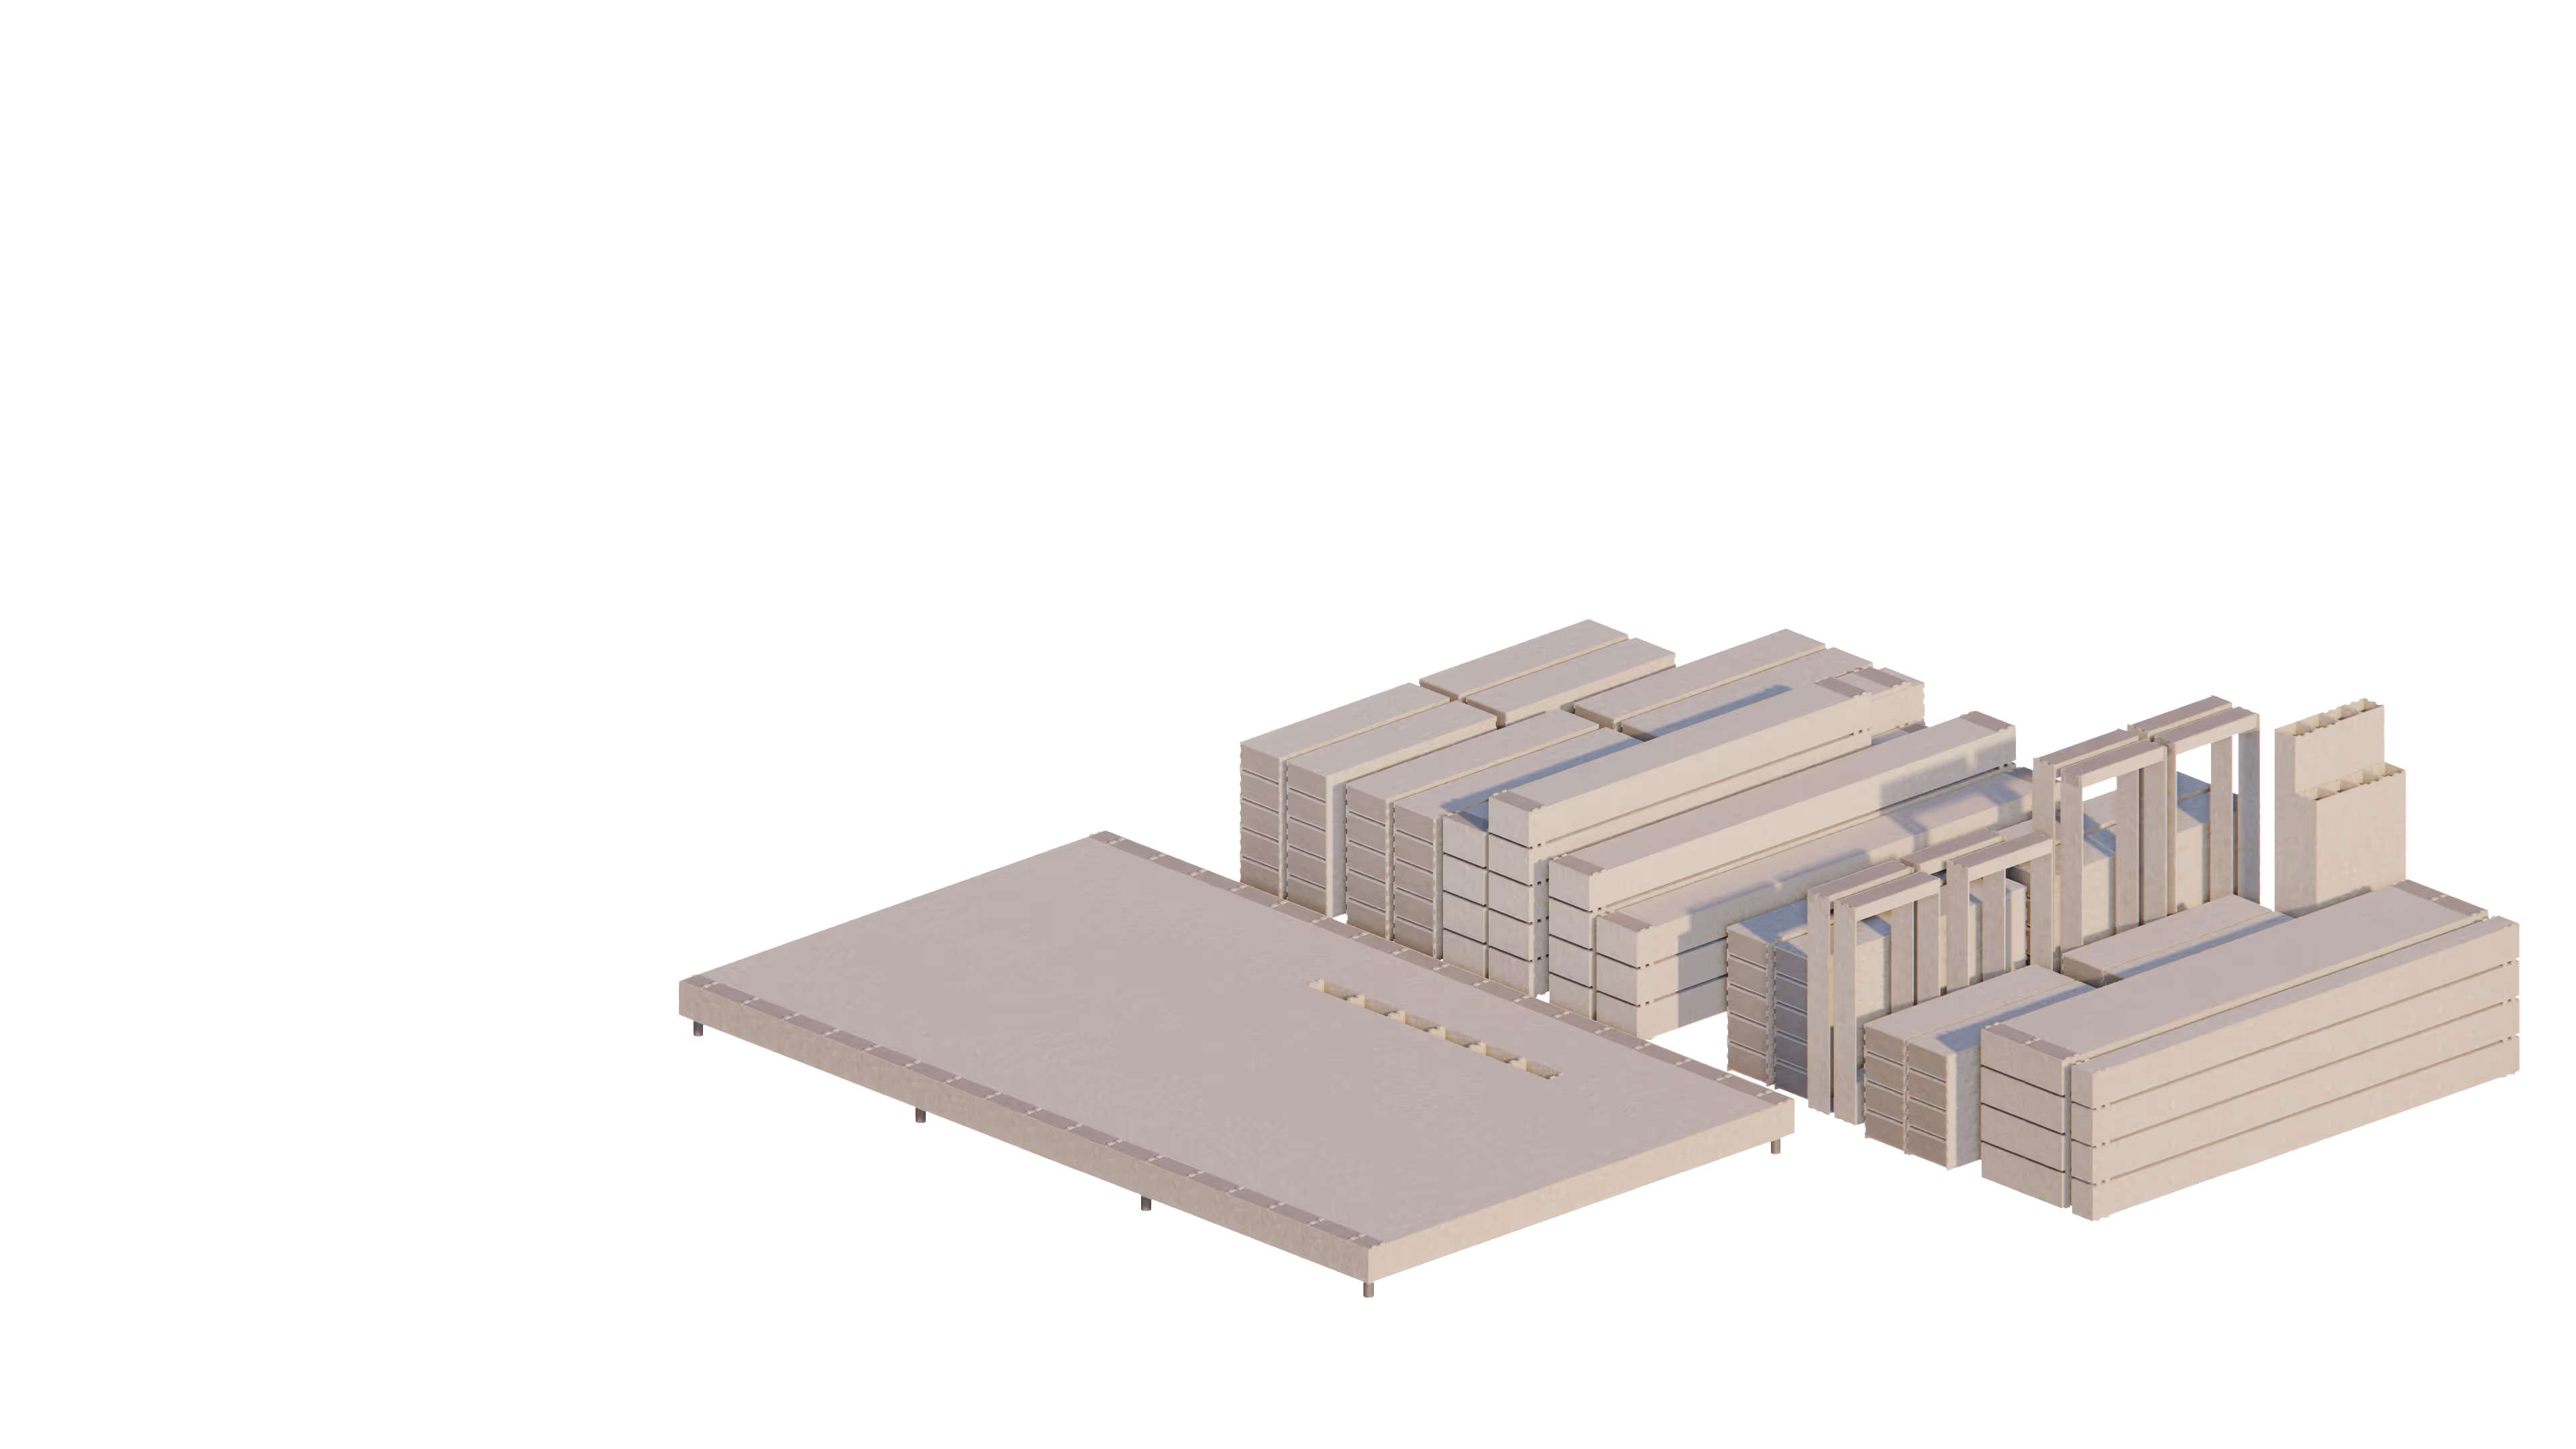
FLOOR blocks
FLOOR blocks are installed next and these come in a range of spans (currently XXXS to L) and range in weight between 70-120kg. You'll need a team of at least 4 people or a pallet jack or genie lift to help lift and manoeuvre a beam into place on the sole plates. Start at one end of the house and work your way along adding the 600m wide FLOOR blocks one at a time. Standard bow-ties are used to join the FLOOR blocks together, and these can simply be tapped into holes with a rubber mallet to lock everything in place. Check to make sure that no bow-tie hole has missed.
Note: Insulating gaps
Insulation, usually a soft-fill batt, needs to be fitted to the ends of the FLOOR beams and END blocks. It’s important to pack any gaps with insulation so there will not be any ‘cold bridges’ or uninsulated areas between inside and out, where heat could leak out.
XFLOOR blocks
Where structural cross walls are located in the building plans and assembly instructions, specialist XFLOOR beams are used in the floor system to create a connection between the bracing cross walls and the soleplates and foundations below.
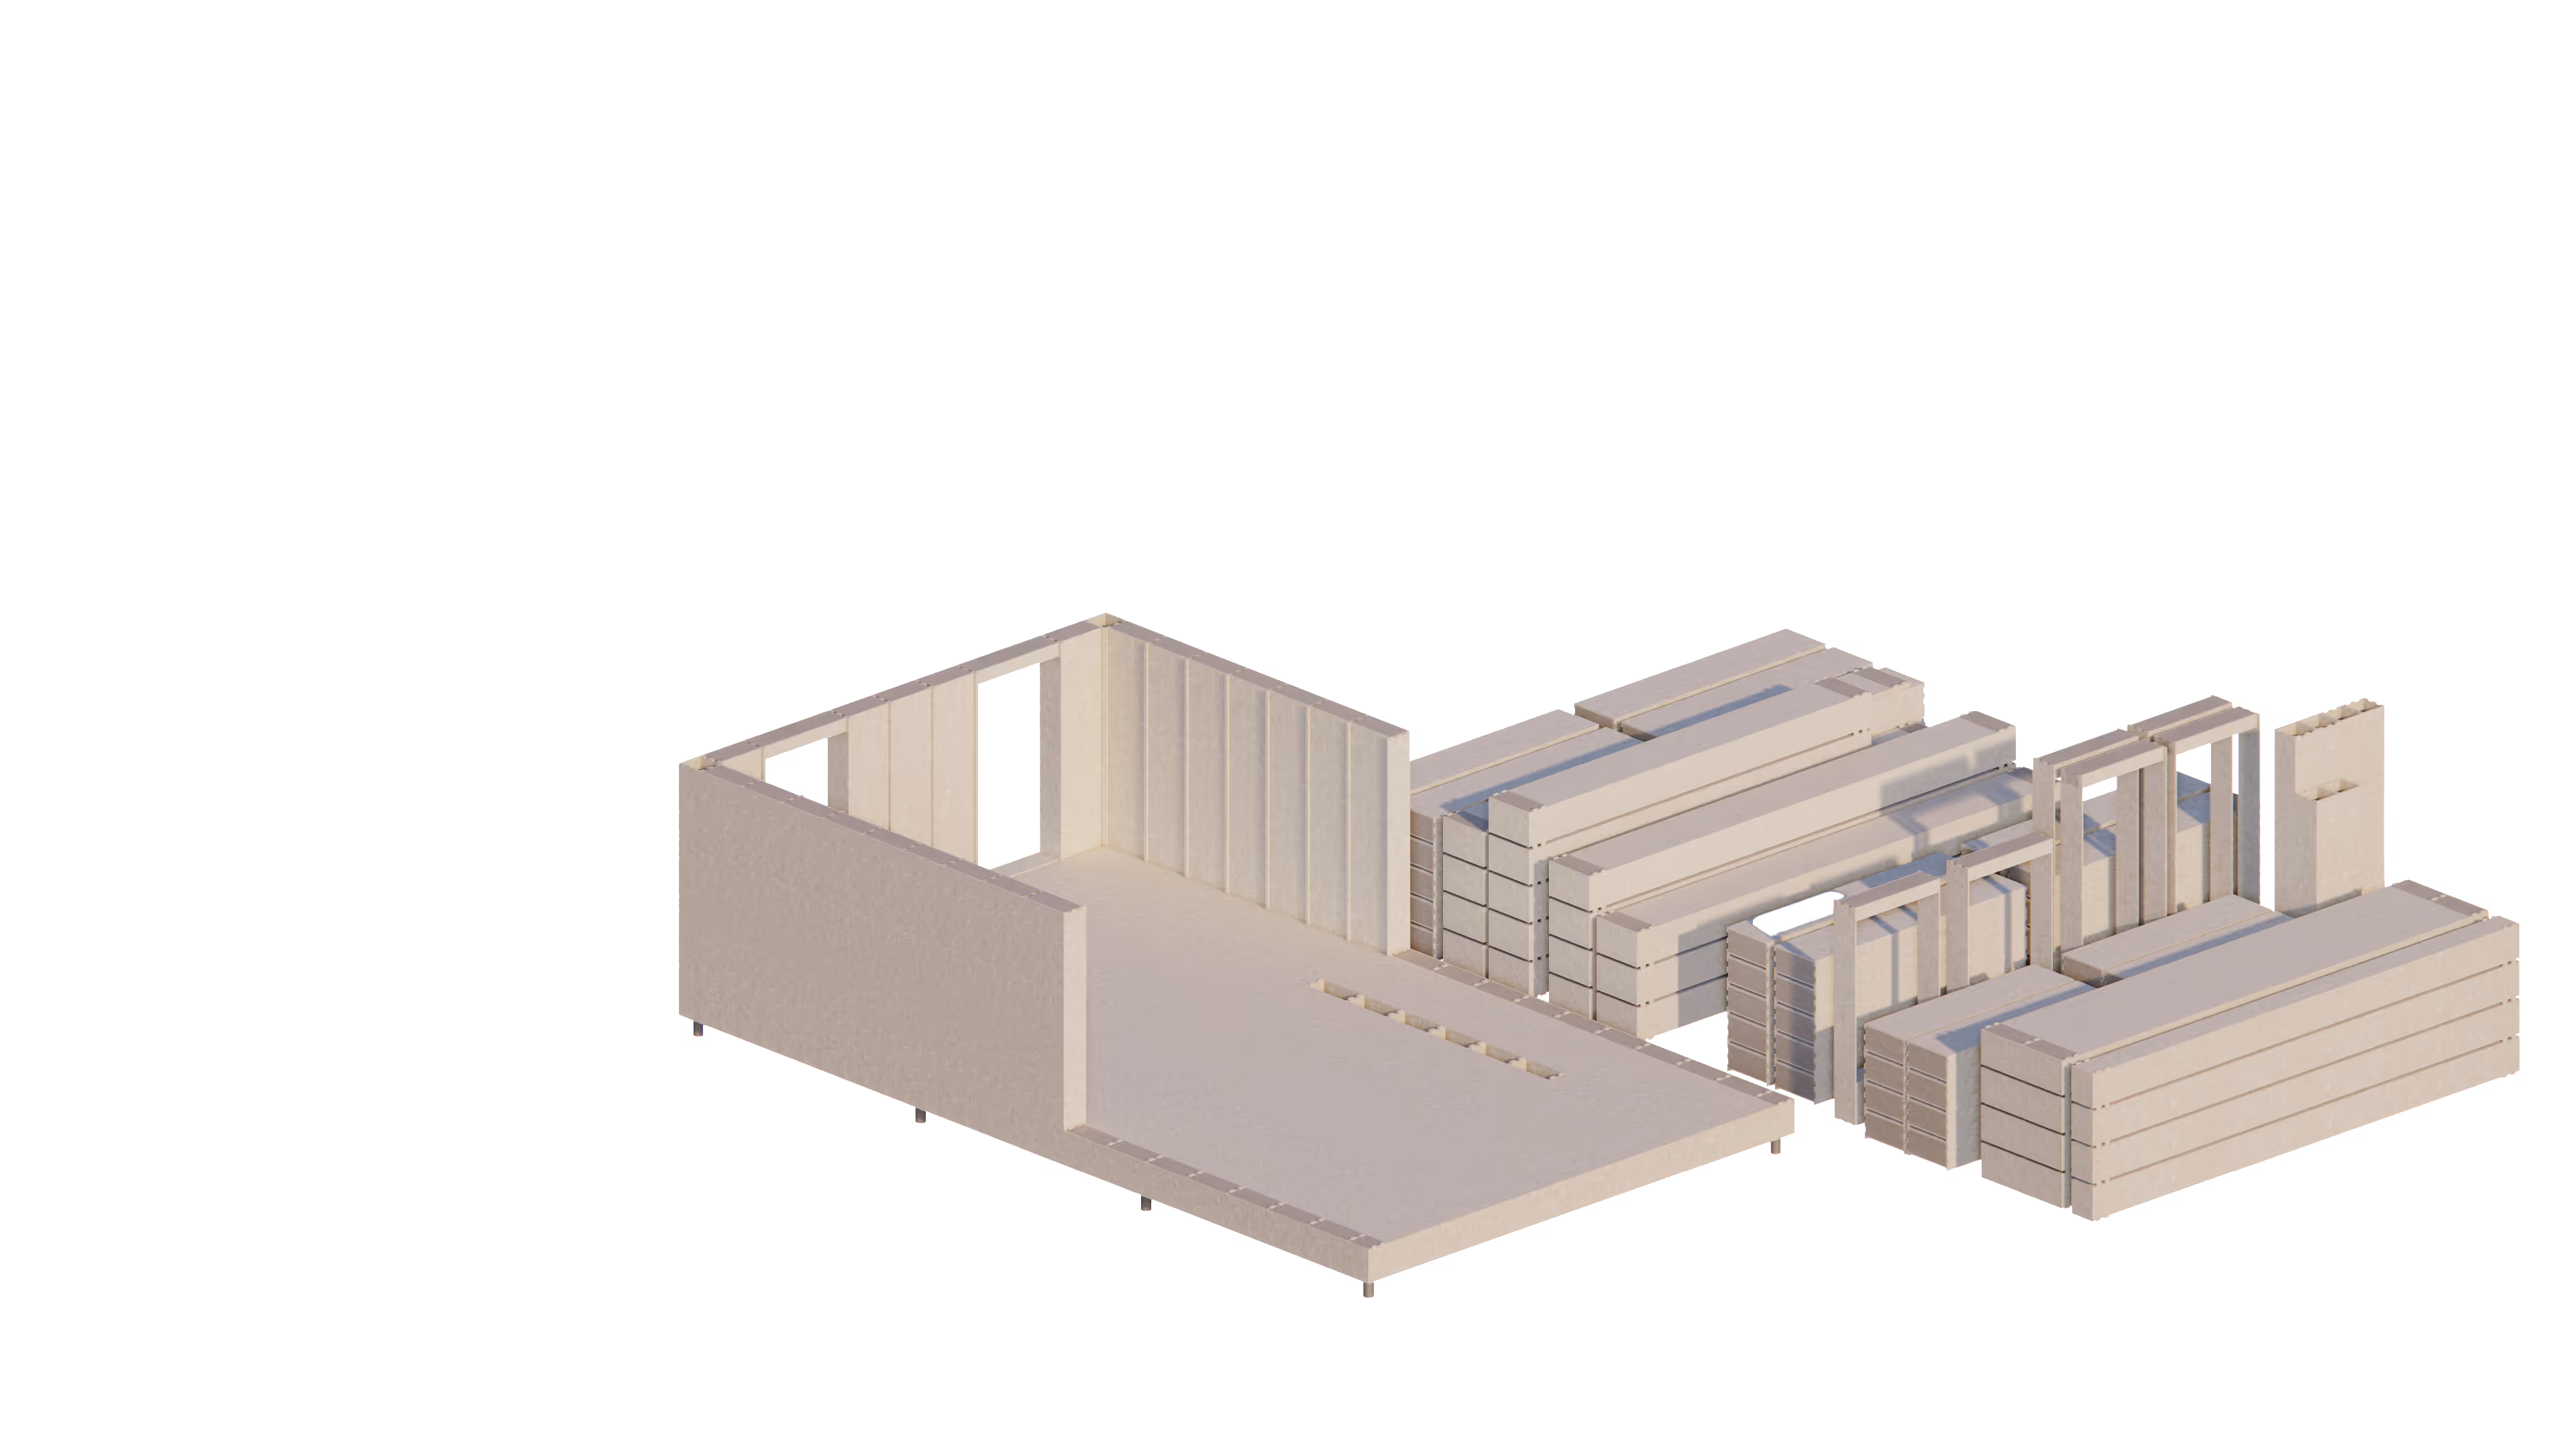
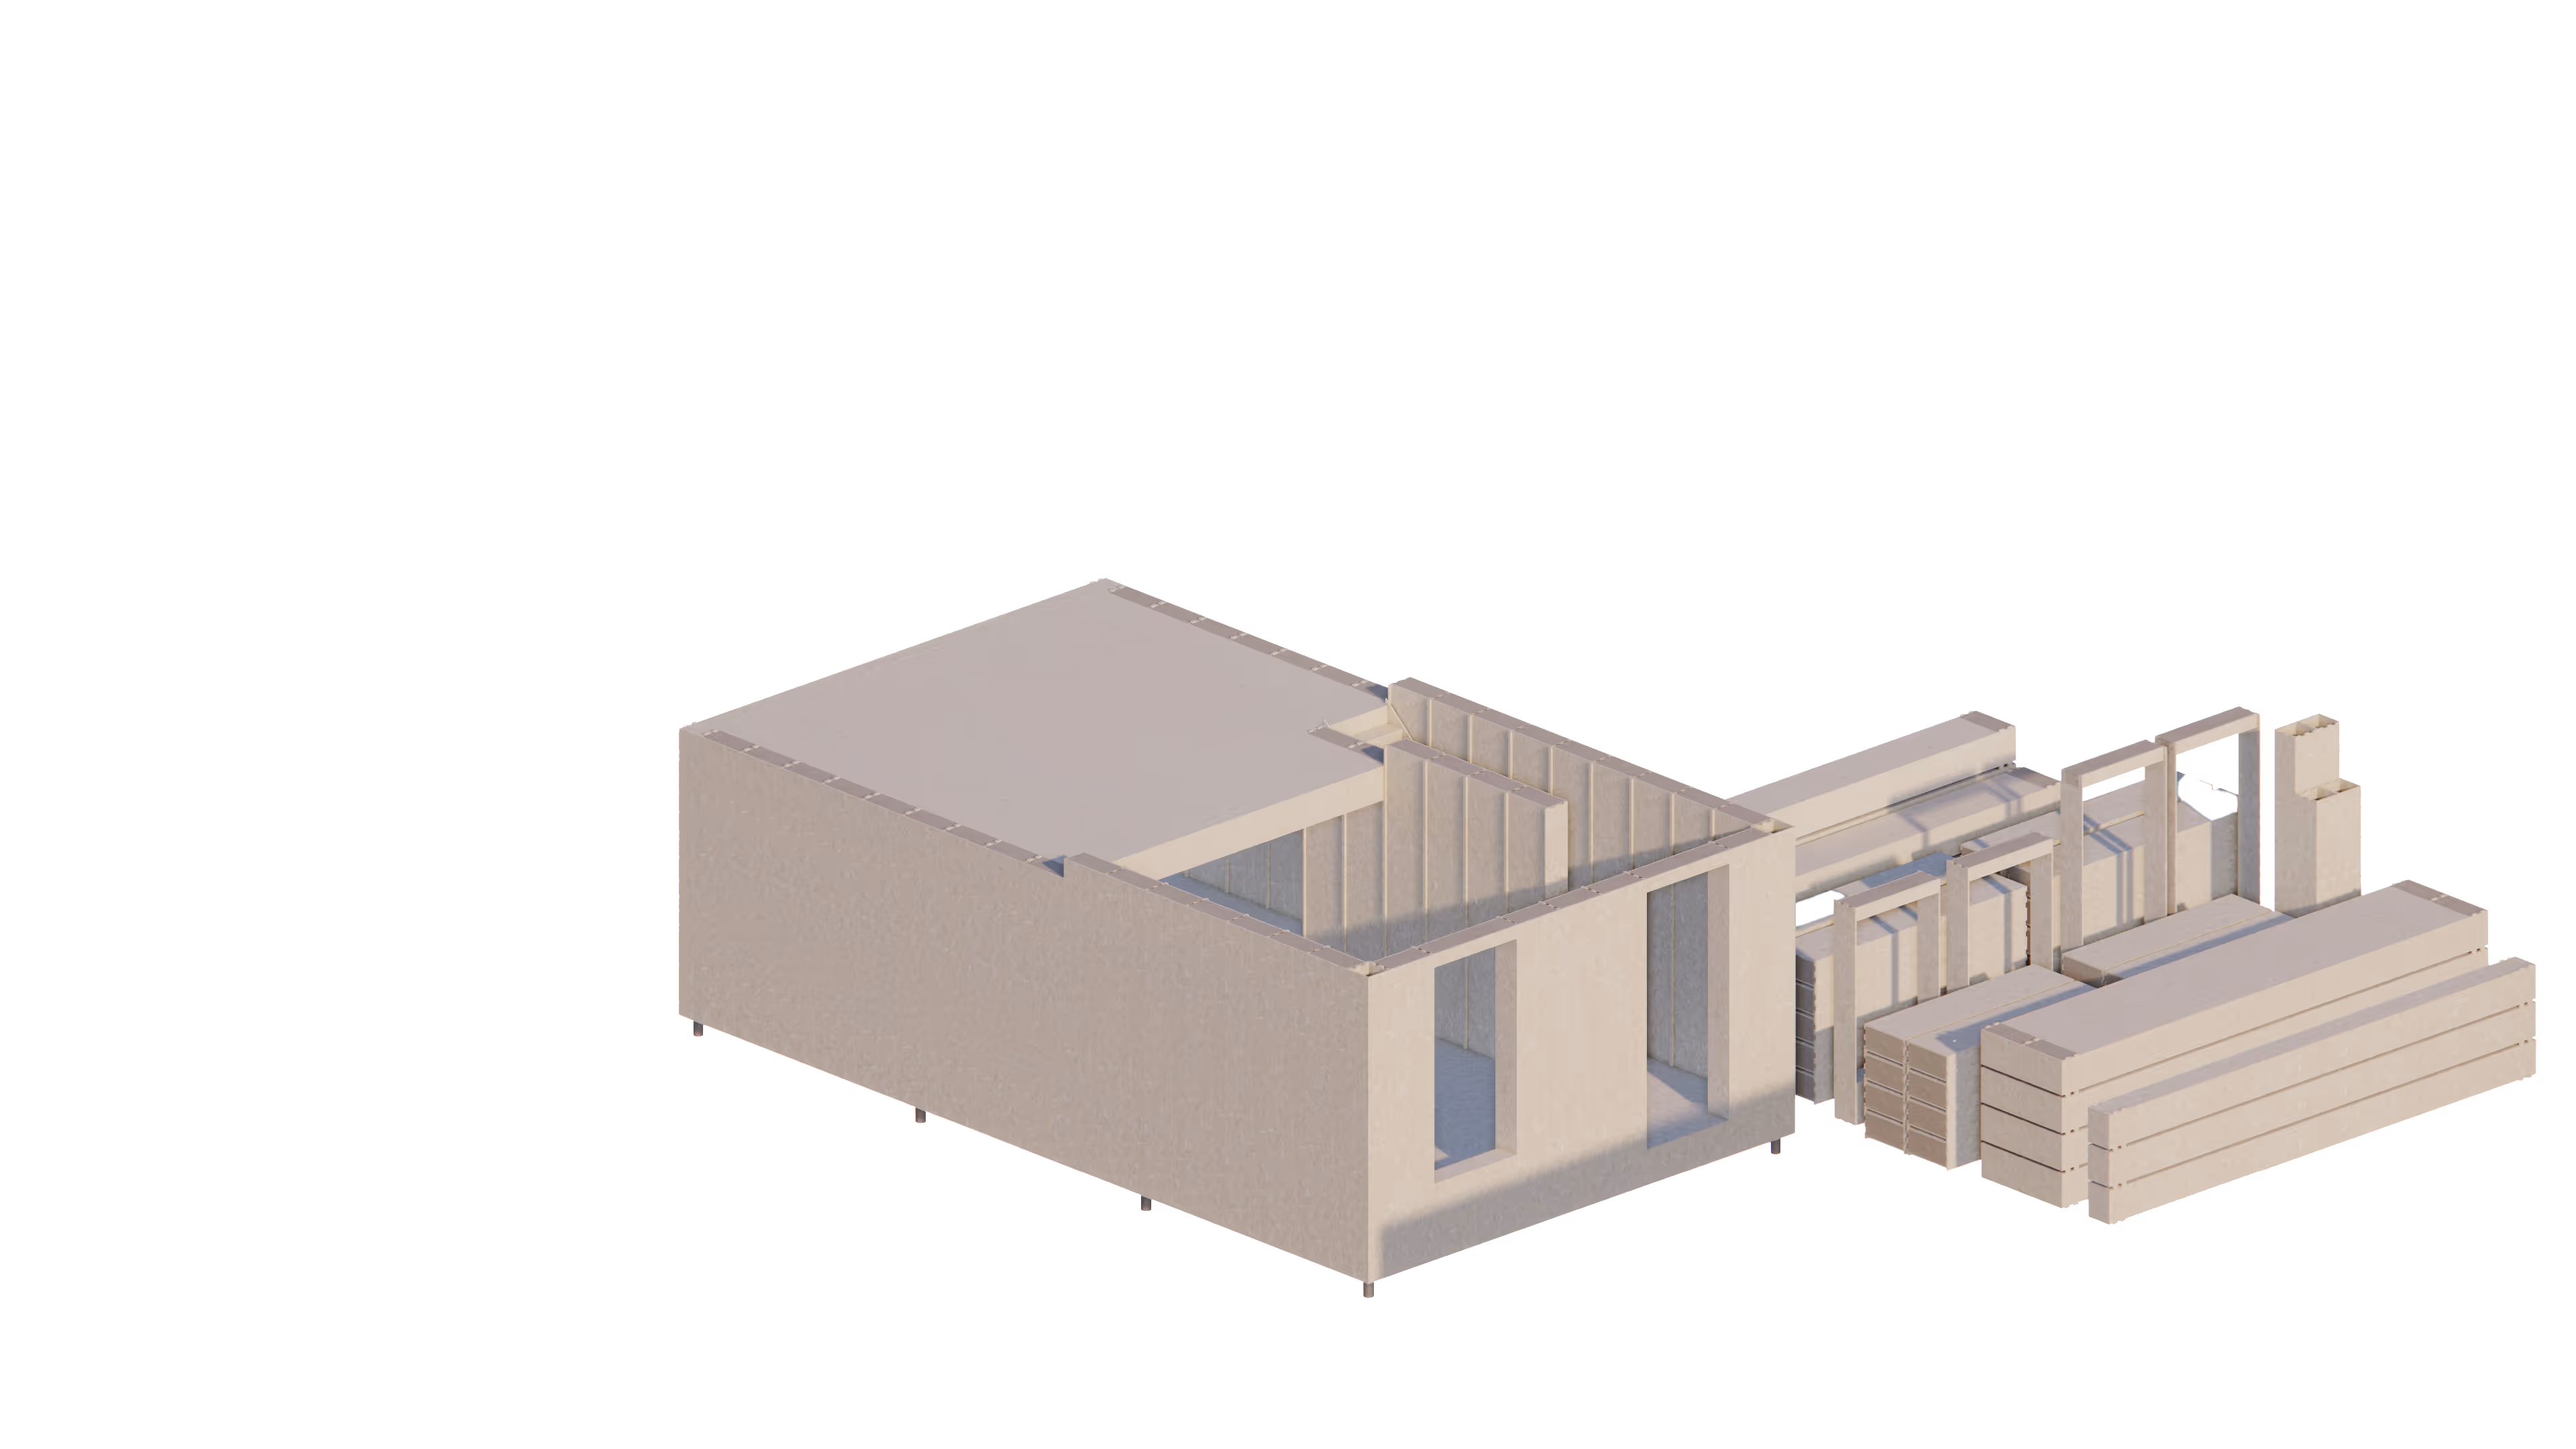
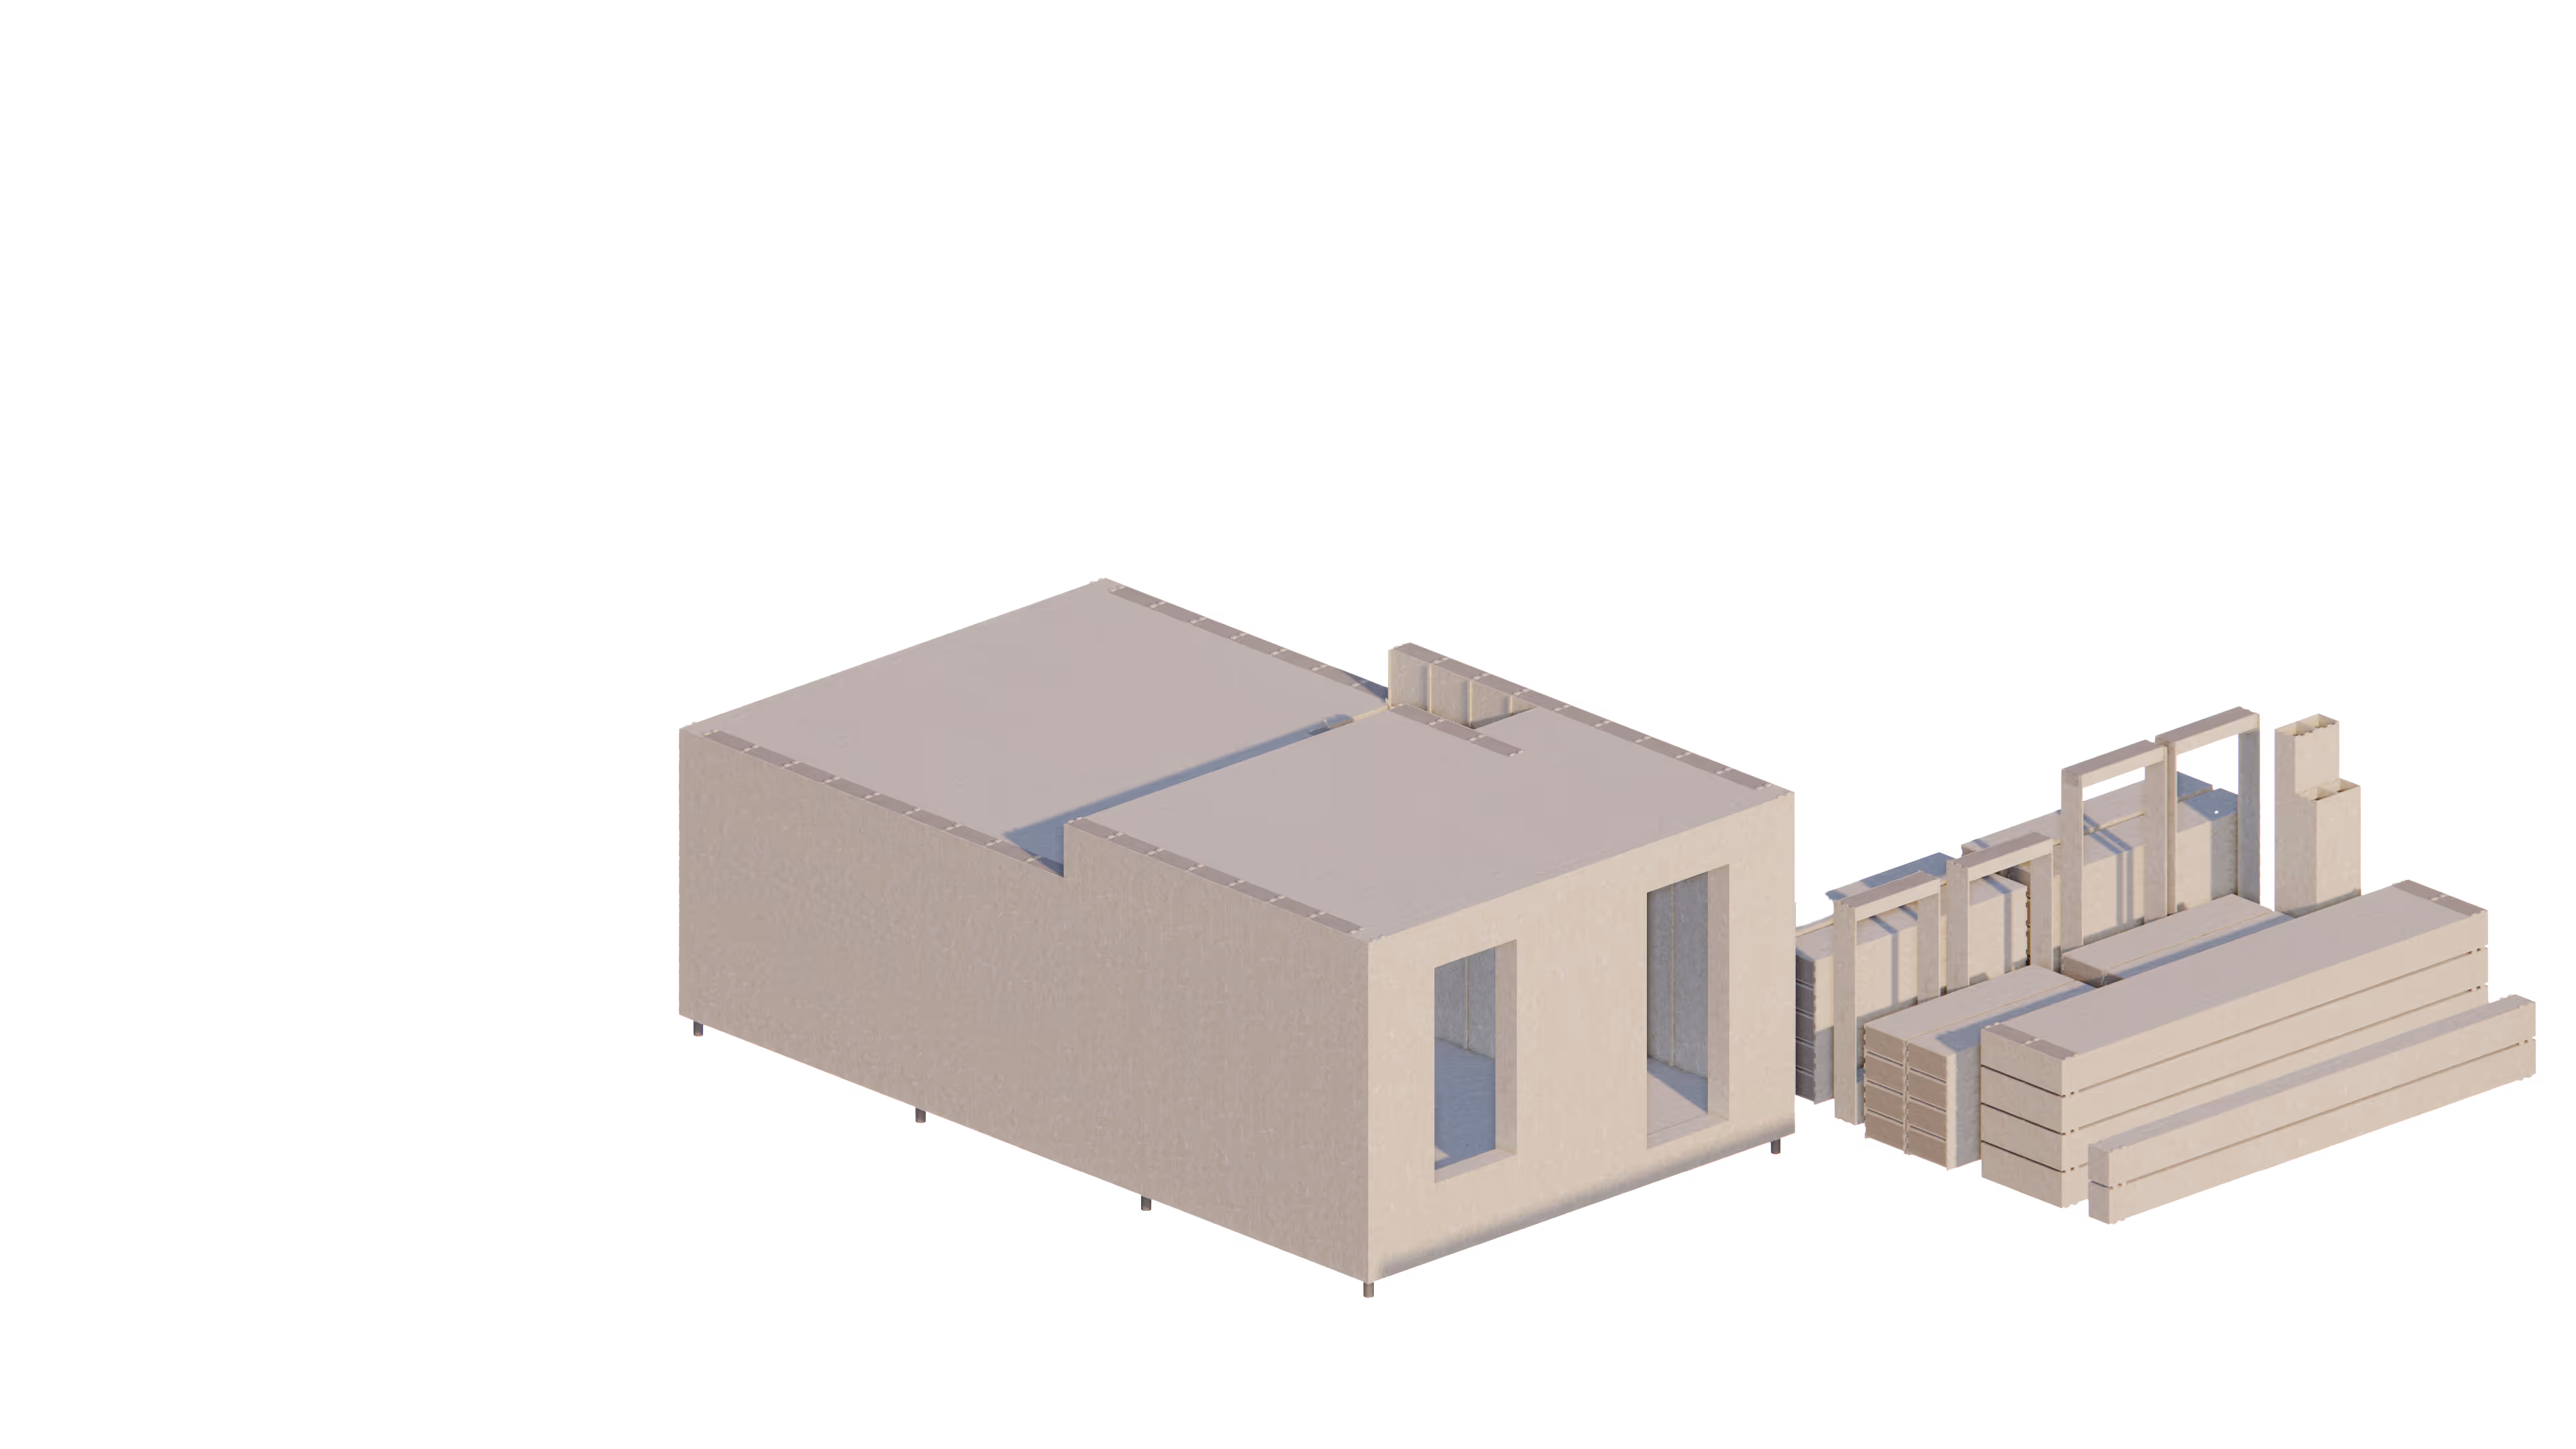
Walls
Skylark WALL blocks are quick and easy to install. The manufactured and assembled blocks should be delivered to site pre-insulated and ready to lift into place on to the floor structure.
WALL blocks come in a range of sizes (S to XL) to create different height ceilings, and are used together with corresponding CORNER, DOOR, and WINDOW block sizes. A typical WALL block weighs around 40-60kg and can generally be carried by two people. The blocks lock into place over raised tabs on the outer edges of FLOOR and END blocks.
The WALL blocks are connected together and also attached to the FLOOR blocks using the timber bow-ties. These should be malleted flush with the block internal and external panels to lock the WALL system into place. Check to make sure that no bow-tie hole has missed.
Windows and doors
Windows and door openings have specific WikiHouse blocks for different opening heights and widths that match with wall heights. Installers are responsible for making sure the correct WINDOW or DOOR block is used in the right place. These blocks are connected to the WALL blocks using bow-ties (and sometimes half bow-ties). Where possible the sides of the opening blocks should also be screwed into the sides of the WALL blocks using 50mm wood screws (or similar). In the v0.2.2 system the WINDOW and DOOR blocks come with a built-in lintel to support any blocks above the opening.
Upper floors
If you're building two or more storeys, installing the upper floor structure is very similar to installing the blocks for a roof.
Lifting
Depending on the span and materials, the weight of the standard FLOOR blocks can range from 50kg to around 150kg. Unless you're working with the smallest spans, you're likely to want to use some mechanical assistance, such as a Genie-lift and forks, to help lift and position the FLOOR blocks onto the tops of the walls safely. In some cases, it might be more efficient to use a HIAB crane or telehandler forklift, especially if you are already using those for delivery and unloading on site.
Connections
Intermediary floors are made up of the FLOOR-1 blocks, which have bow-ties connecting them to the WALL blocks below and the WALL blocks above. The connection between the ends of the FLOOR blocks and the top of the wall only requires the standard bowties, three on the outside and three on the inside at either end of the beam.
Across the deck of the upper floor area bow-ties will need to be fitted, in the same manner as the ground floor.
Note: Insulating gaps
Insulation, usually a soft-fill batt, needs to be fitted to the ends of the FLOOR beams and END blocks. It’s important to pack any gaps with insulation so there will not be any ‘cold bridges’ or uninsulated areas between inside and out, where heat could leak out.
Stair voids
With two storey or higher buildings there will likely be some provision for internal stairs. There are two ways to approach this with the WikiHouse Skylark system. If the stairs run parallel to the direction of the FLOOR beams, then a small landing, as a bespoke FLOOR block, would need to be fitted to span across the void. If the stairs run perpendicular to the FLOOR beams then an array of shorter span beams, with a load bearing wall beneath, can be used to create a void in the floor on one side of the building.
Stairs
WikiHouse STAIR blocks are available in the SKYLARK250 series, at various heights that correspond to standard wall block heights. The WikiHouse stairs have been designed with a common 42 degree pitch.
WikiHouse stairs are designed to be pre-assembled as a whole unit and installed between two supporting walls, so the stringers will need to be fixed to adjacent walls with screws directly into timber members. There will need to be enough screws to ensure the stairs are secure and safe to use. If unsure, refer to the structural engineer’s specifications.
The upper landing of the stairs will usually be modified WikiHouse FLOOR block, and stairs will also need to be screwed at the top to this too.
For more complex stair configurations and designs you can also use any other proprietary stair systems or custom-designed joinery to fit the stair void dimensions.
Upper walls
Upper storey WALL blocks are installed in the same way as the ground level. The blocks should be delivered to site pre-insulated and can be mechanically lifted or simply carried up to the first floor level, where they are raised into position on the ends of the floor blocks and secured on the inner and outer faces using bowties. Bowties on the inner wall face should be installed first, while bow-ties on the outer faces can be fitted using a freestanding ladder (not leaning on walls) or mobile platform.
Scaffolding is not strictly necessary at this stage. However it is important to follow all working at height safety procedures including the use of harnesses and adding temporary guardrails across any tall window/door opening and around voids in the floor.
Roof
ROOF blocks come in a range of types that fit to different spans and pitches. The flat roof blocks come designed with a 1 or 10 degree fall for drainage purposes, while the pitched apex roof comes in a standard 42 degree angle.
Ridge beams
Where pitched roofs are involved, you’ll need to install a glulam ridge beam to support the roof apex. Notches and cut-outs are already included in the standard roof and gable end wall blocks to accommodate a 90mm wide glulam ridge beam. The structural engineer will need to specify exactly what depth ridge is required depending on the internal span and the weight of the roof.
A 250mmx18mm OSB3 or plywood packer will also need to be fitted along either side of the glulam ridge using screws, creating a seat to support the ROOF blocks.
ROOF blocks are installed atop the WALL blocks and, in the case of gable pitched roofs, resting on the central ridge beam. They are fixed to the WALL blocks using standard bow-ties on the internal and external panels. Like the floor, bow-ties are also used to join the ROOF blocks together, so a roof ladder and harnesses may be needed to install the bow-ties over the surface of the roof.
ROOF blocks can be attached to the ridge beam using longer angled screws at the ridge and shorter screws underneath at the apex of the ceiling internally.
Roof openings
SKYLIGHT blocks offer standard roof openings for the 42 degree pitched roof types. These can be installed in the same way as normal ROOF blocks, but they are larger and heavier, so may need some additional consideration when handling.
.svg)

