WikiHouse
Design kits
Standard WikiHouse blocks come in the following categories
- Wall blocks
- Floor blocks
- Roof blocks
- Stairs
- Window, skylight & door blocks
- Lintels that go over openings
- Bowties to join them together
The WikiHouse blocks can be downloaded in a number of different file types, then opened in the corresponding software package. Blocks can be opened in free software like SketchUp & Blender, licensed software like AutoCAD and Rhino, and any other software packages that can open IFC, DWG, SKP or 3dm.
The ‘simple’ blocks are perfect for the earlier stages of design, when you’re looking at form and massing. They are quick to use and simple to edit.
The ‘detailed’ blocks have all the finer detailing within them, perfect for checking junctions and details, and for reviewing how your WikiHouse frame will be assembled. We recommend using these blocks once you have decided on your concept design.
Access the block library here.
How to use the block library
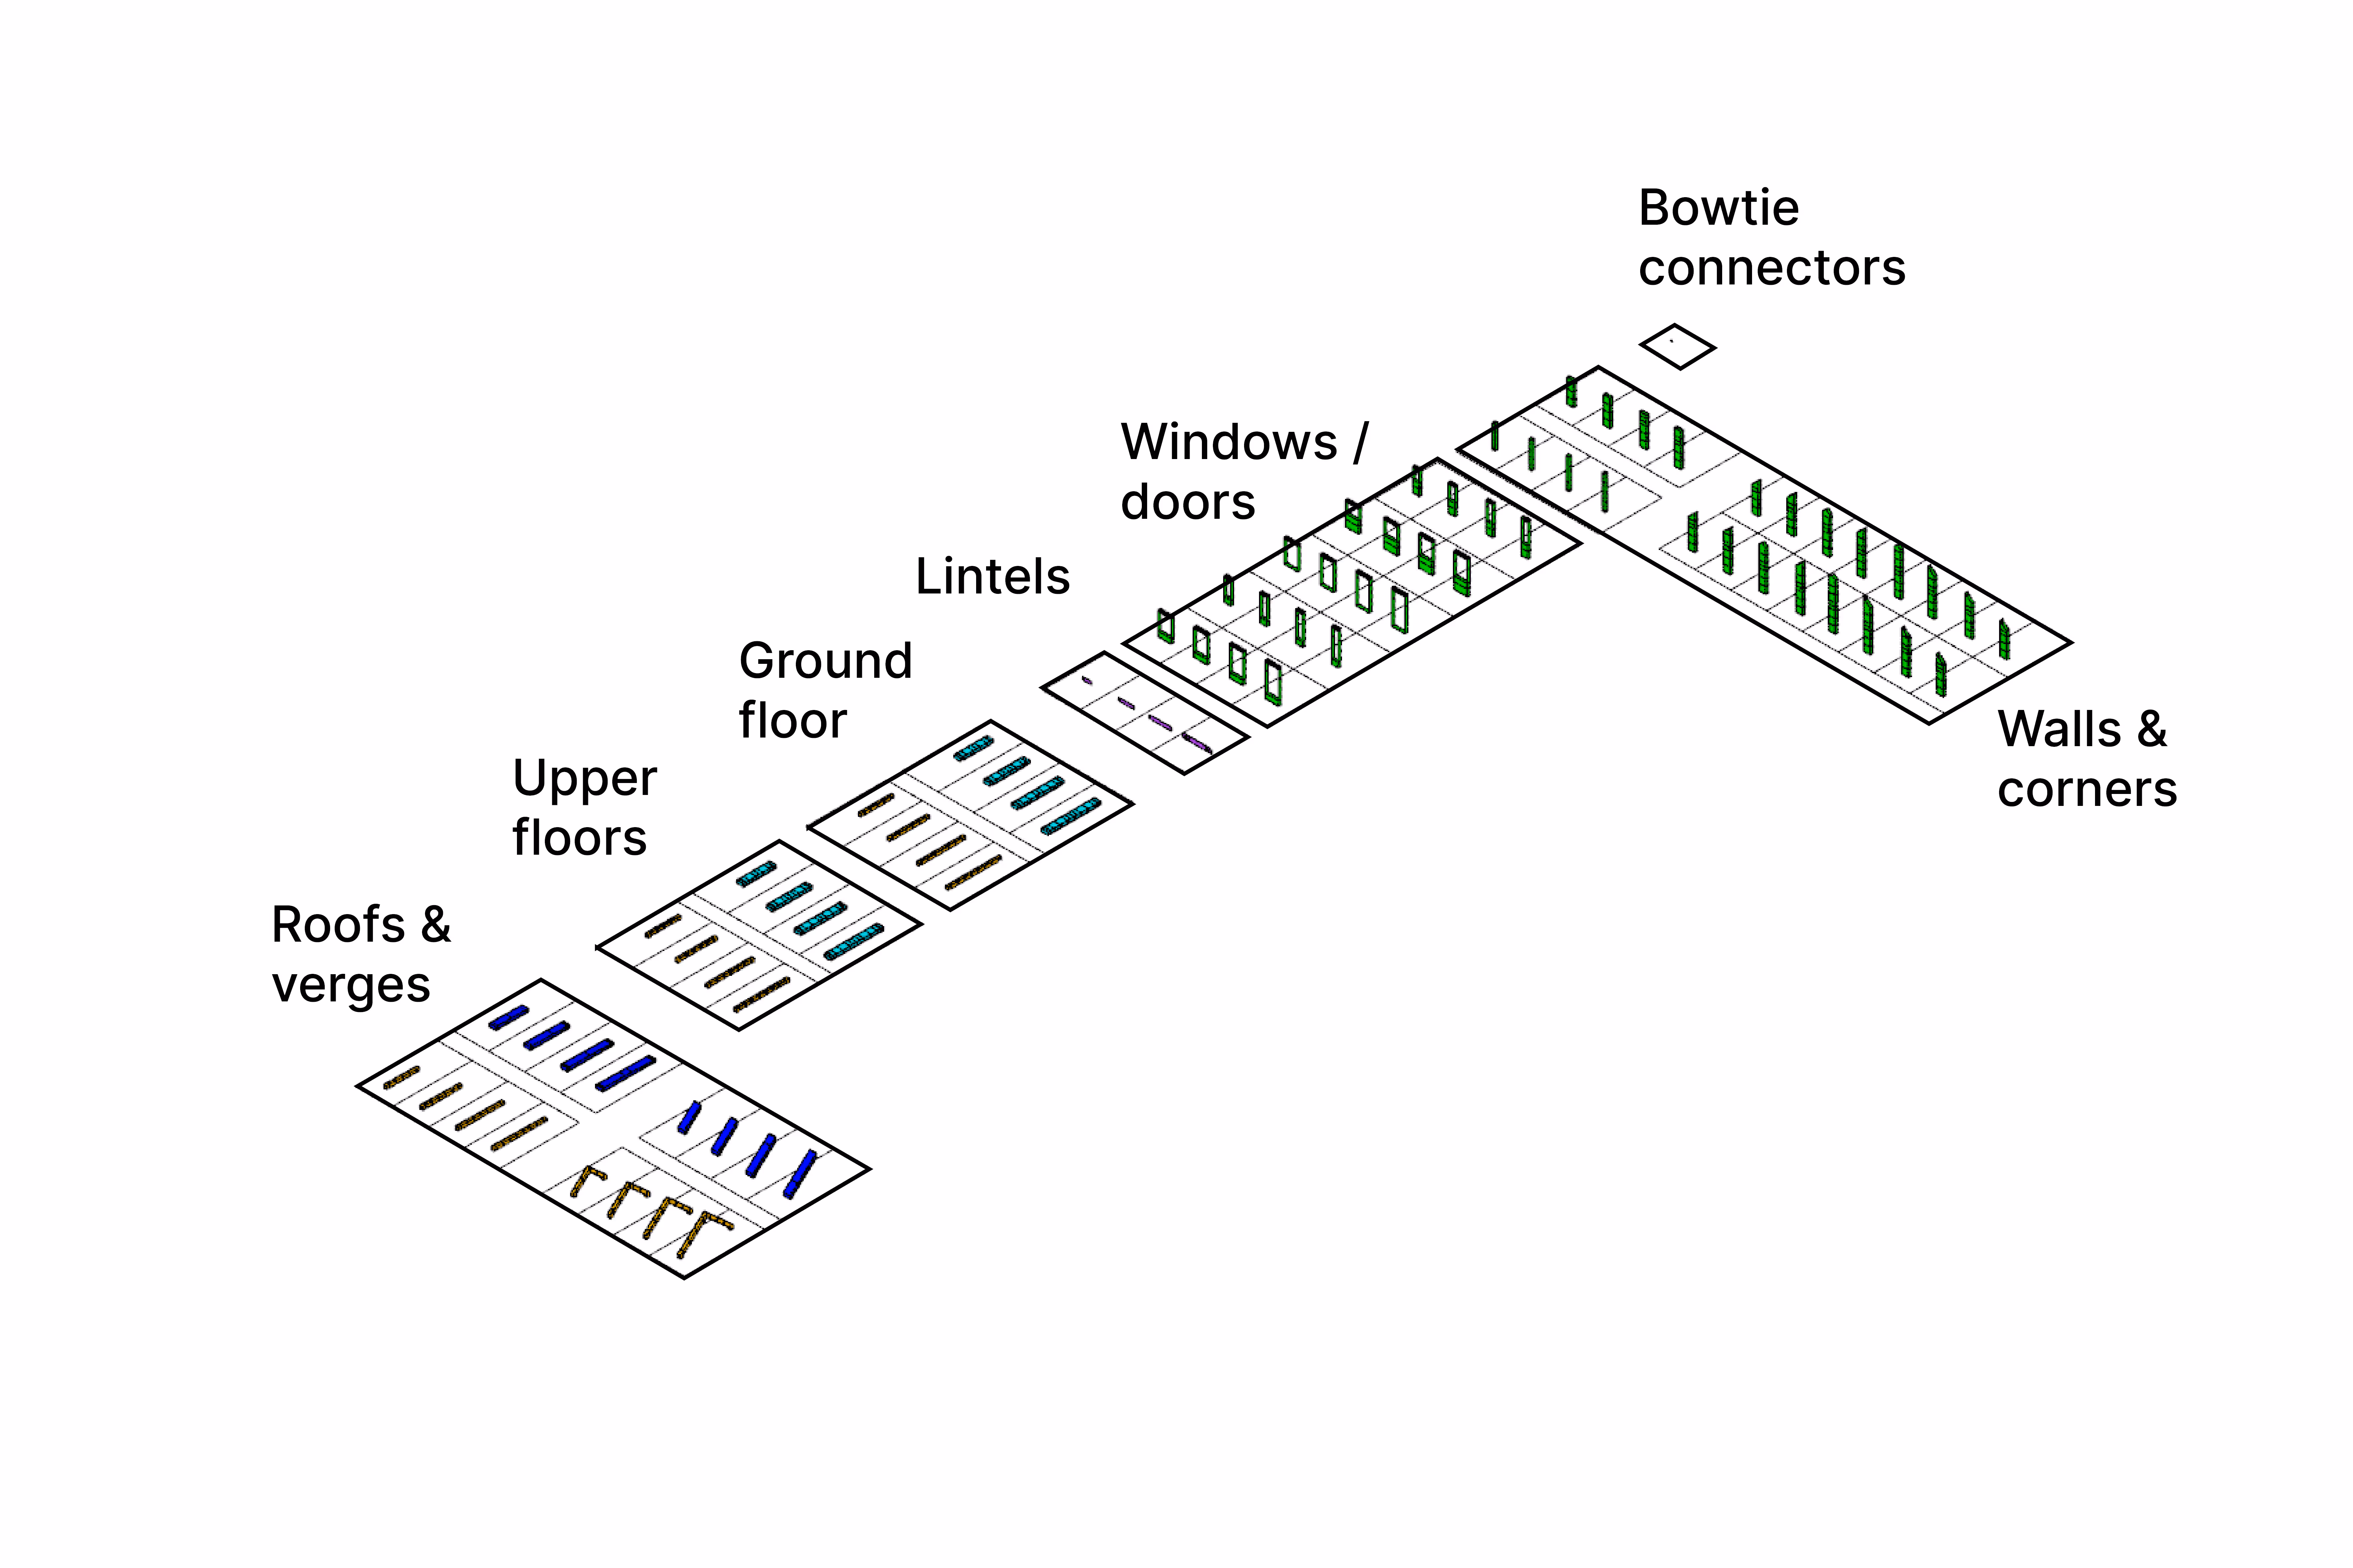
The full block library download file shows all standard blocks in the series.
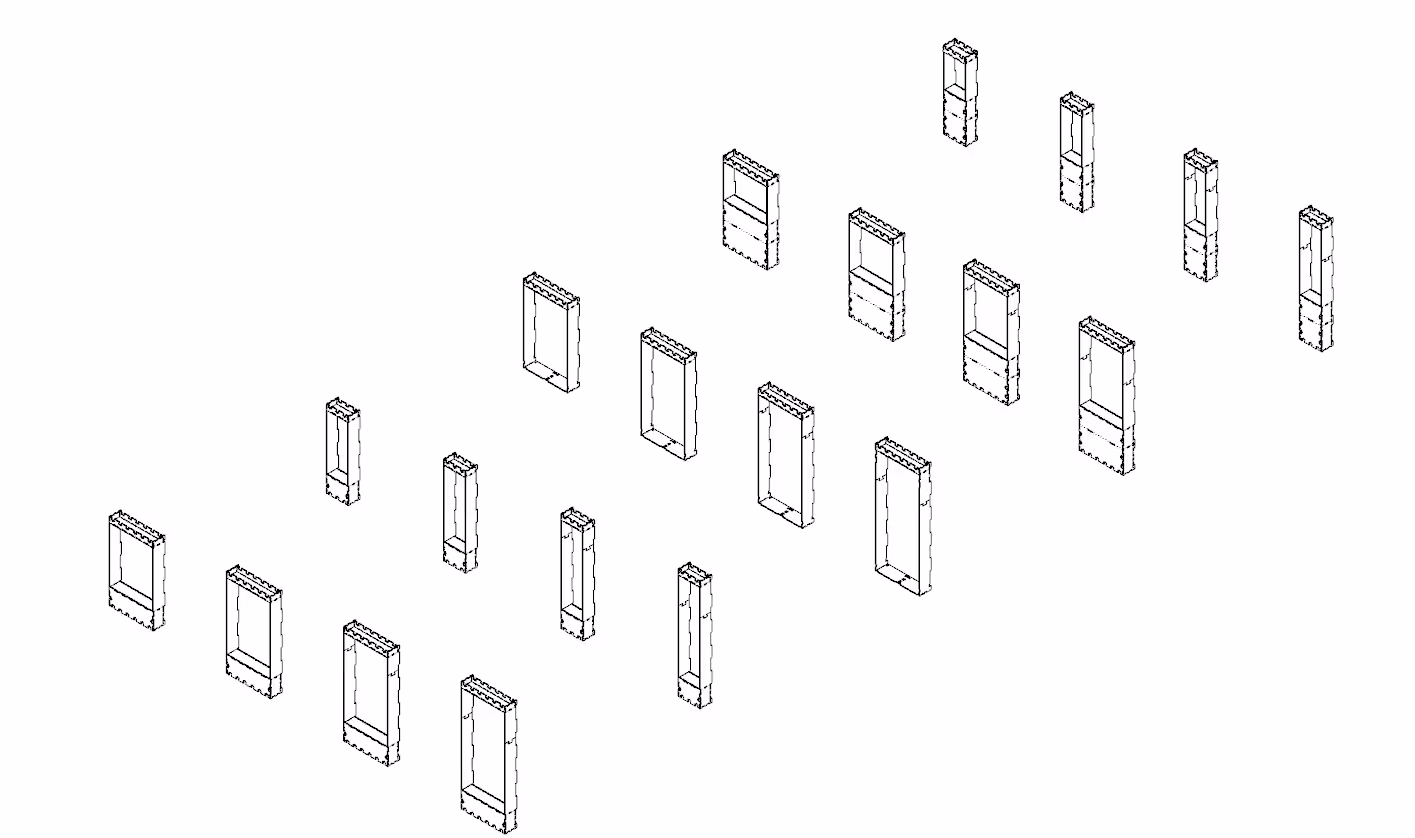
Walls
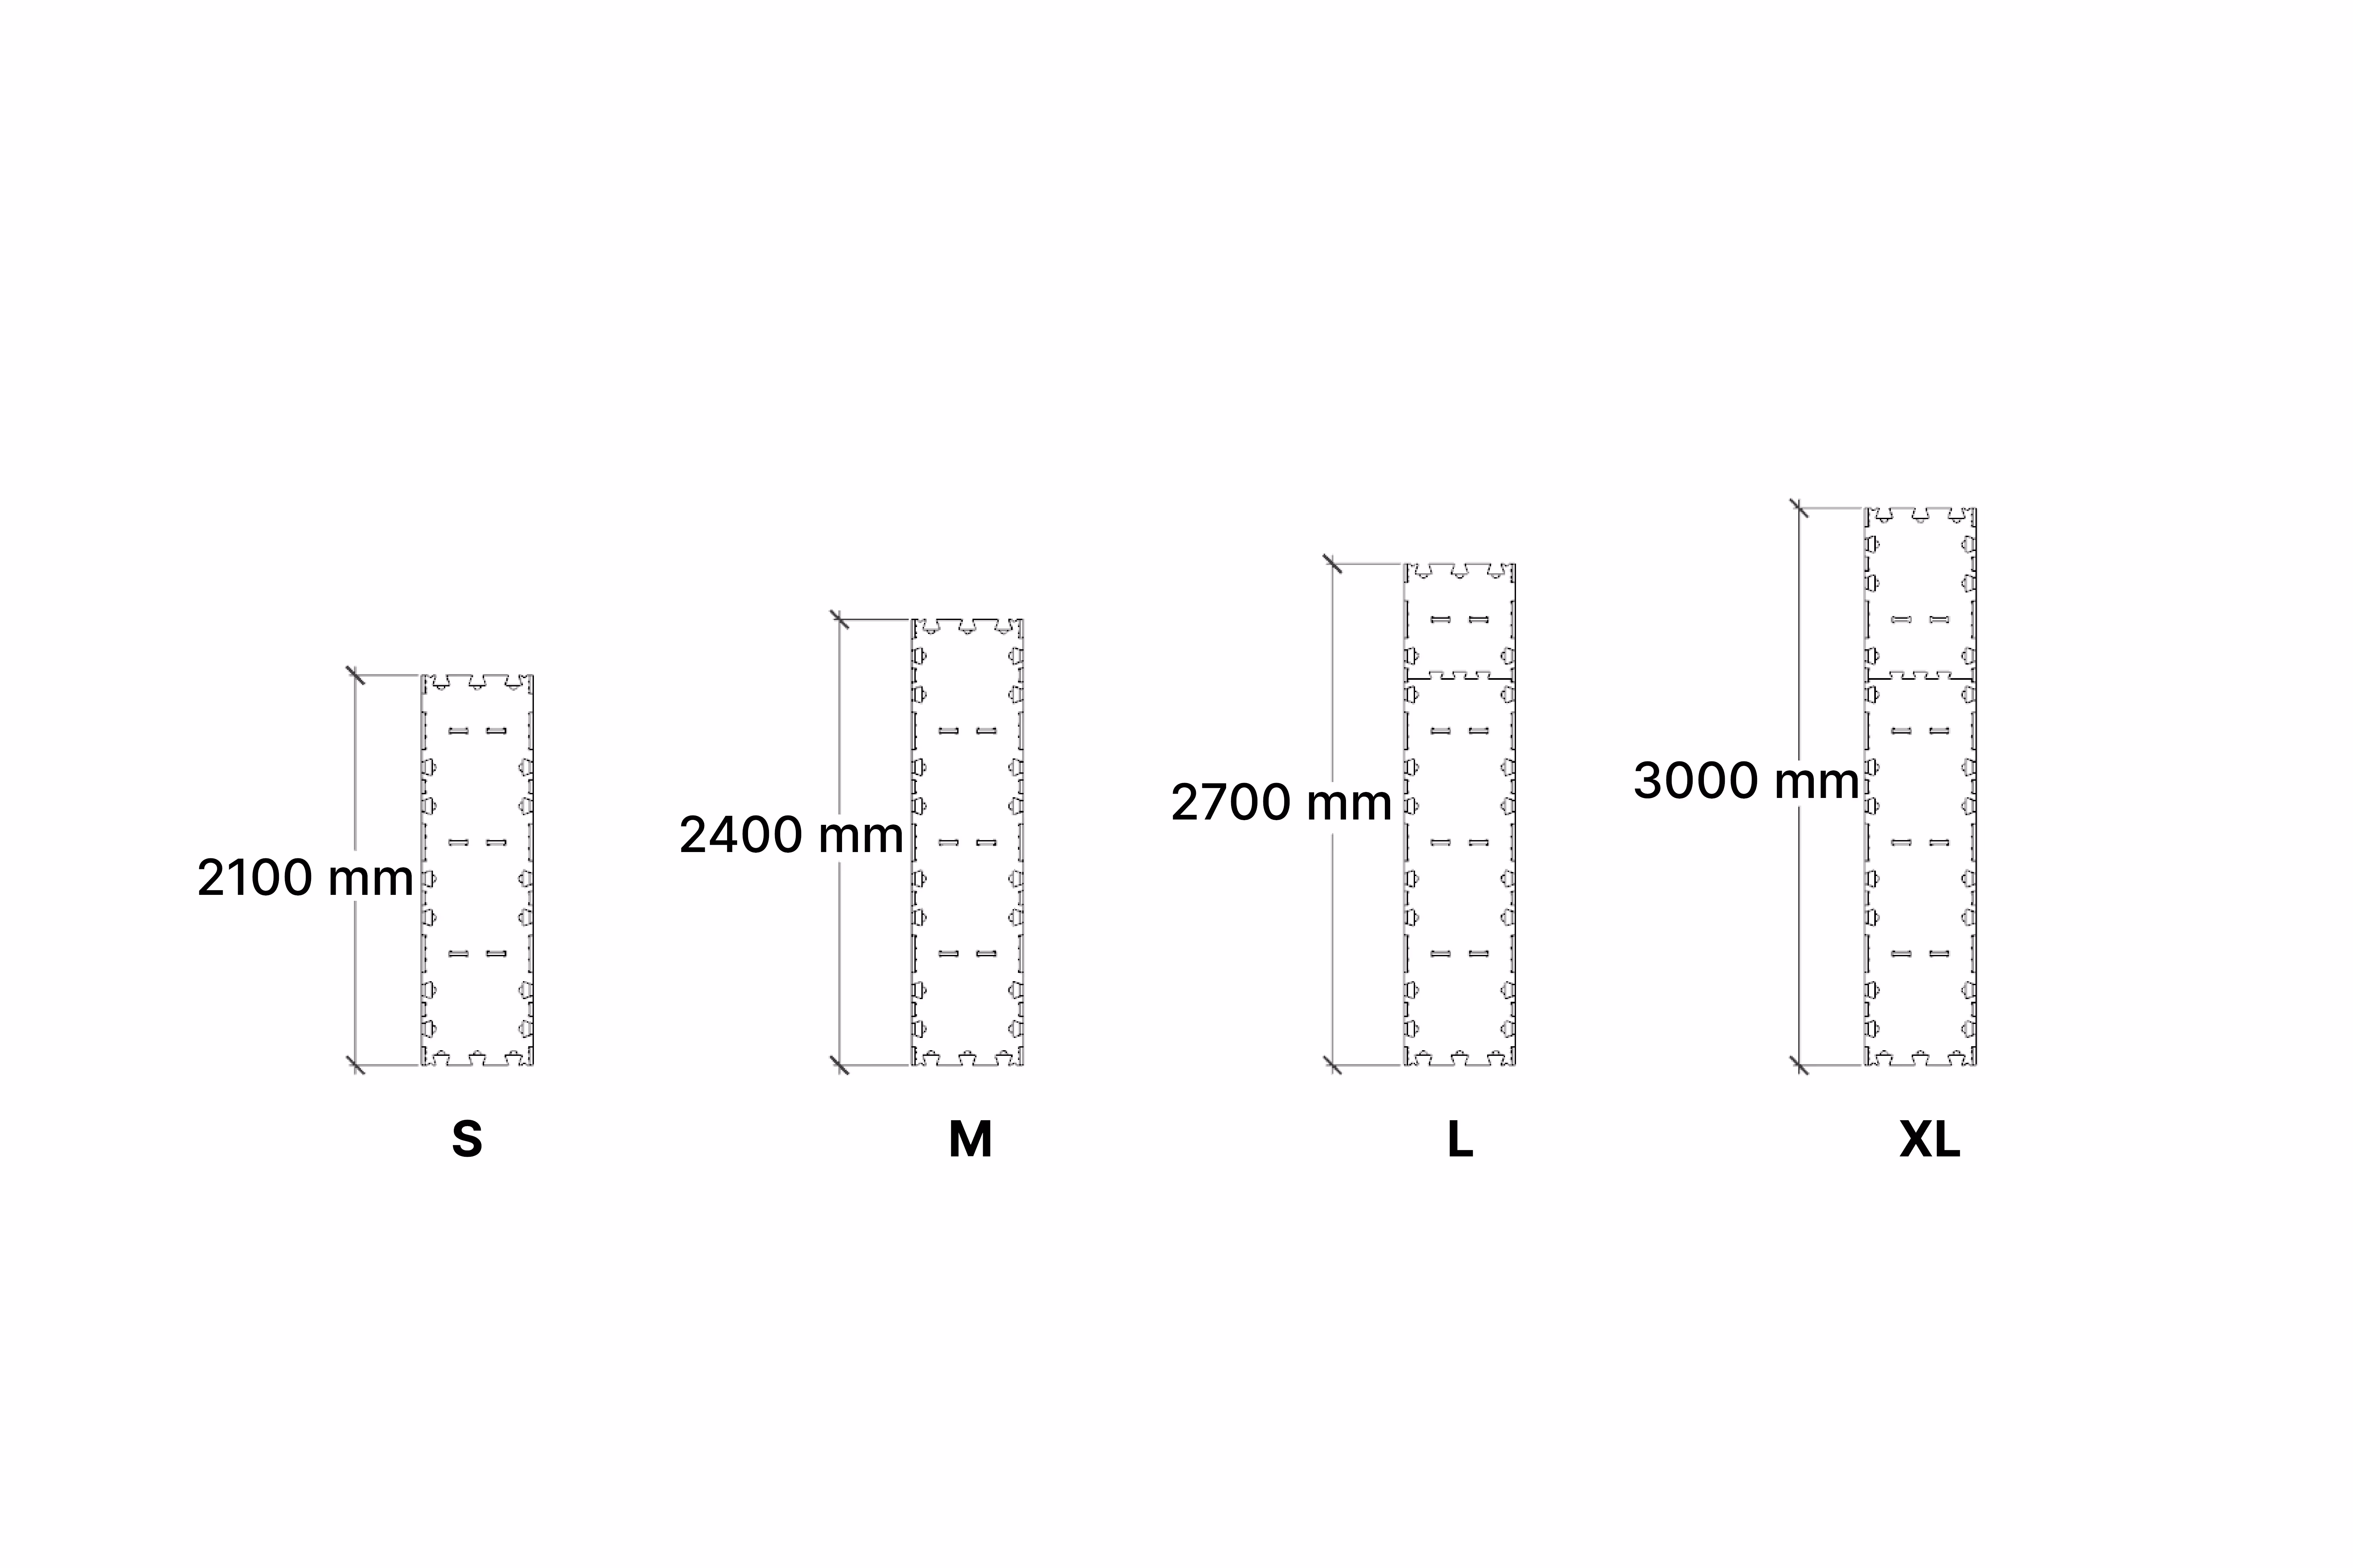
The walls come in 4 standard sizes, offering different floor to ceiling height options.
Floor blocks
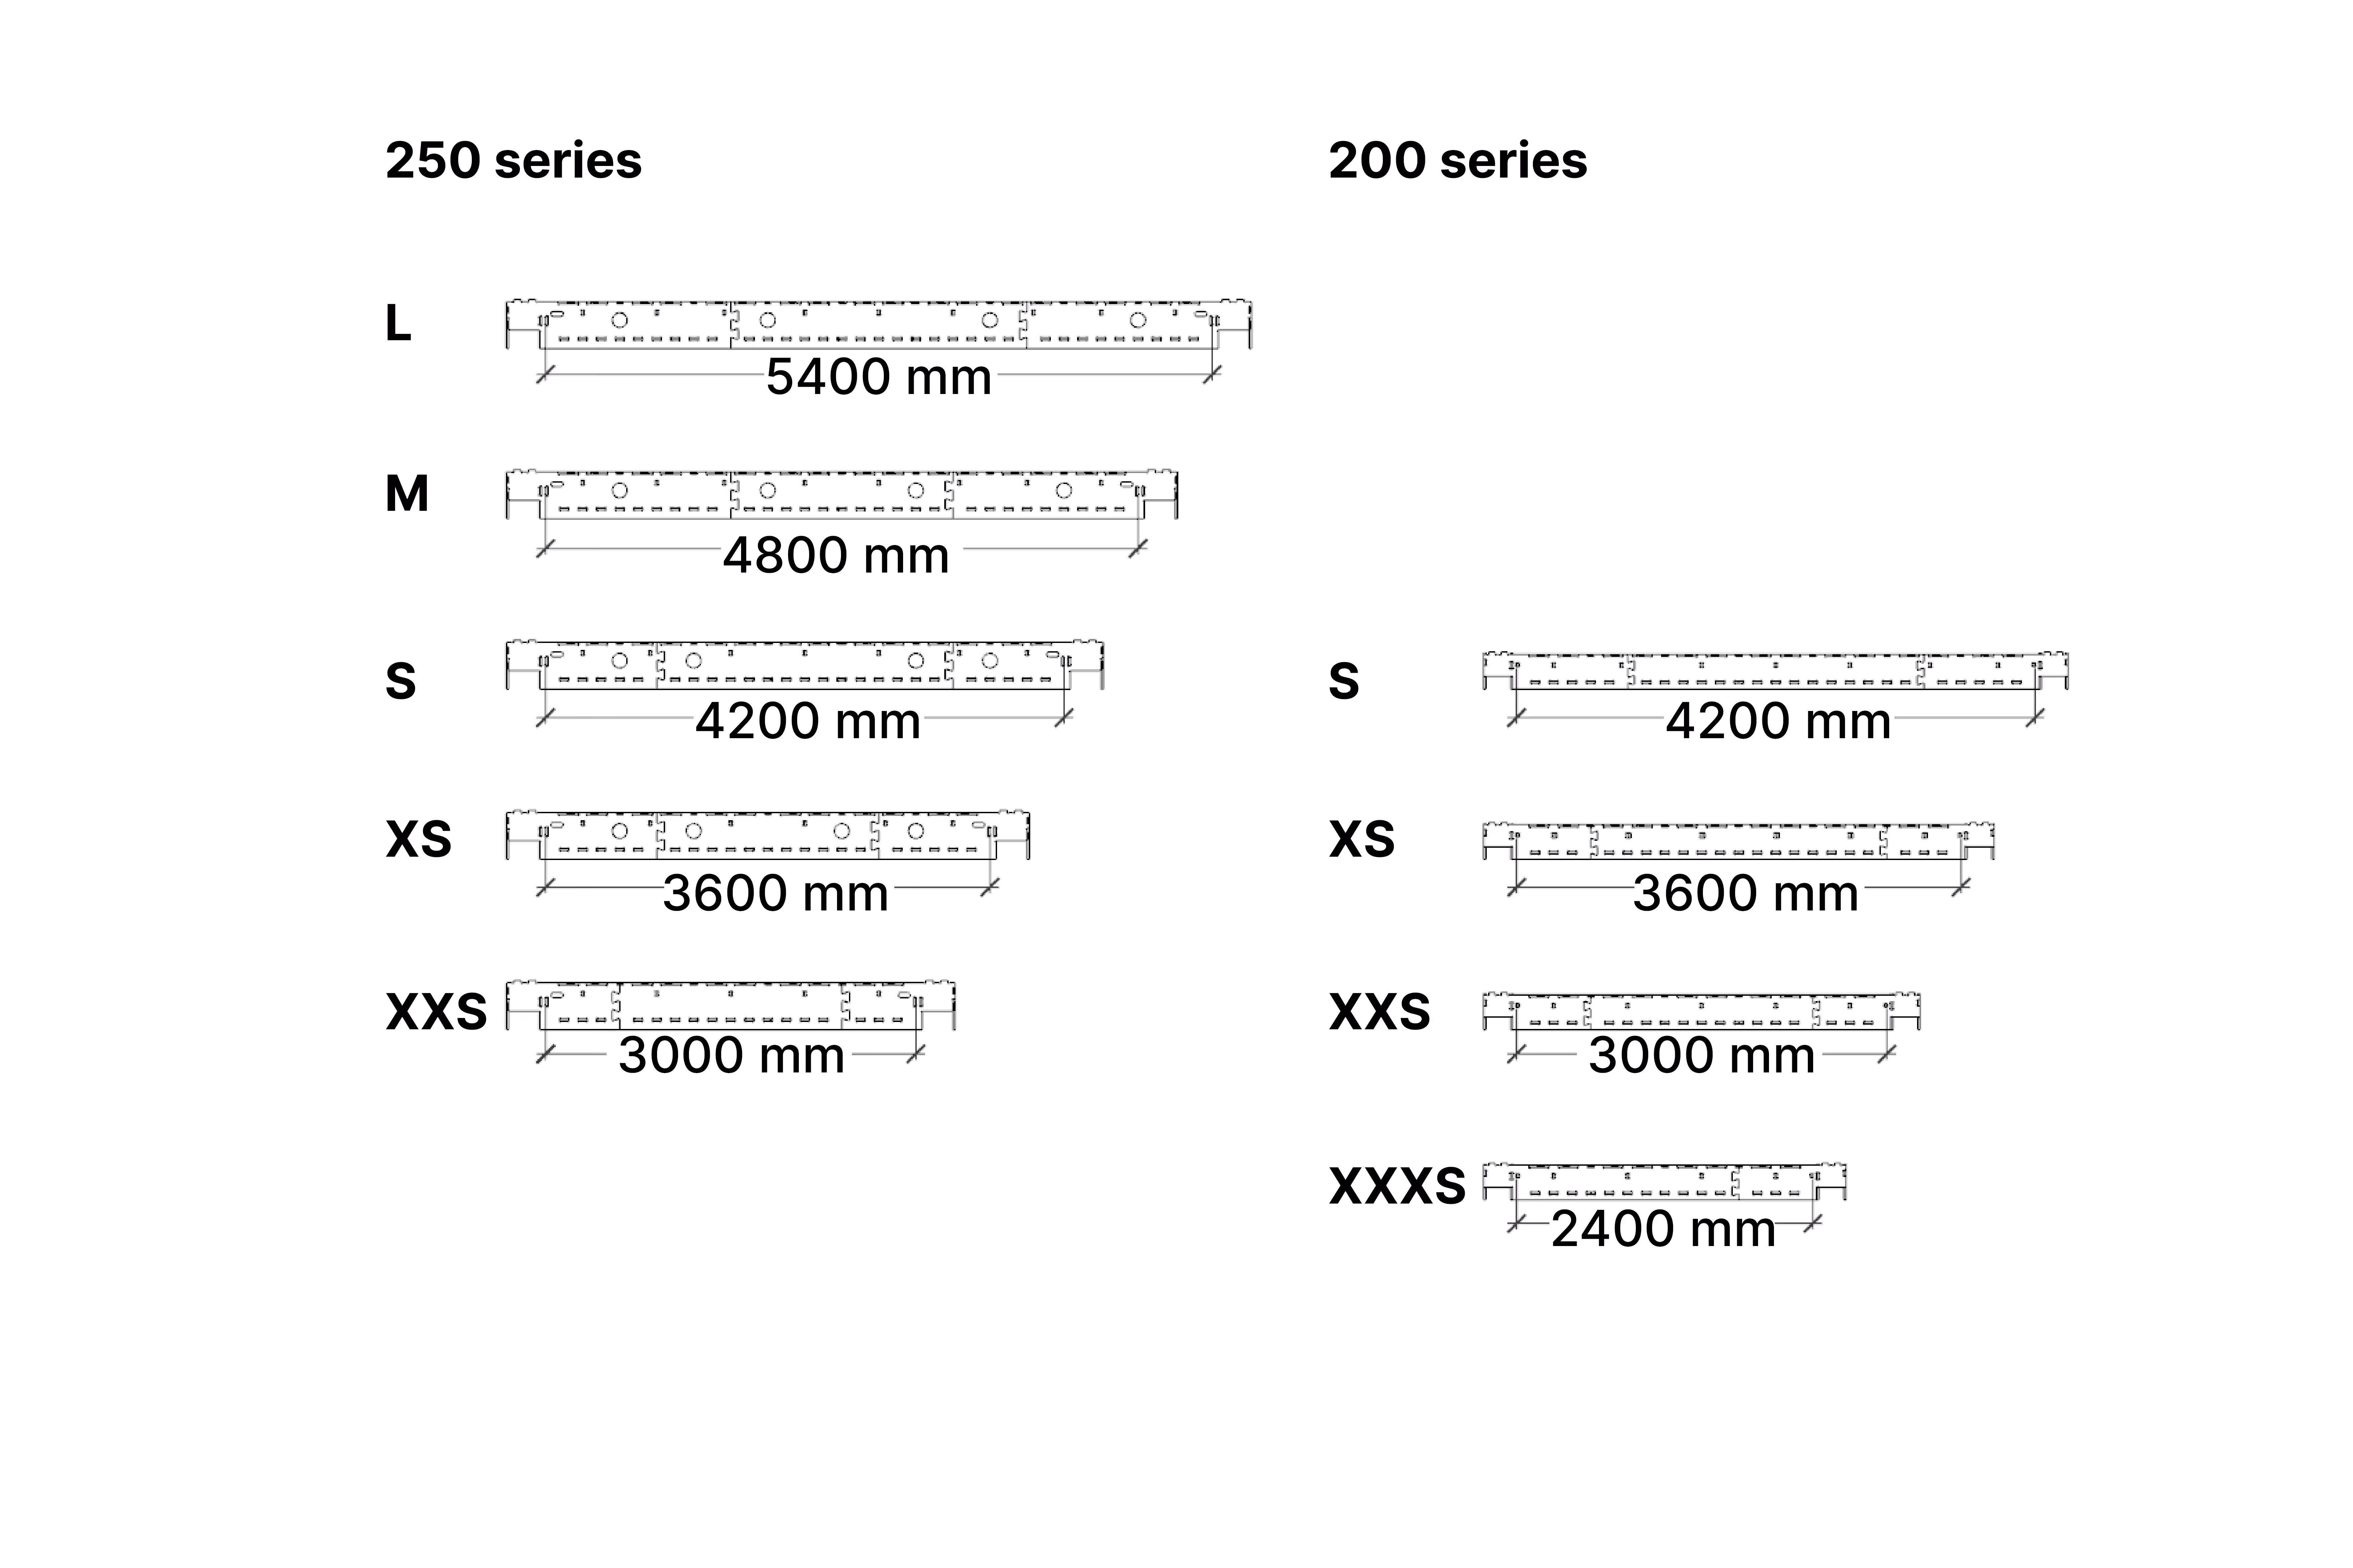
The 250 series offers larger spans due to the increased structural strength from the deeper blocks.
Roof blocks
Your block size will match the floor block span. For example, the M floor block will align with the M roof block.
Stairs
Skylark stair blocks can be inserted more or less anywhere into the chassis.
Stair voids
By definition, stairs can generally only align with the direction of the floor blocks. You may need to modify floor blocks (i.e. shorten them) to create a void space over your stair. Make sure this opening is supported below by a beam or load-bearing wall.
Support
It will need to be supported by (and fixed-into) a main wall or an internal wall on both sides, although if you wish to have one side of the stair open, this internal wall may not need to extend fully to the ceiling.
Types of stair
You can insert most types of stair, including:
- Straight
- L-shaped
- U-shaped (half-turn)
- Winders
- Ladder
- Spiral
However, if you are using a custom stair design that concentrates a significant load onto a particular part of the floor (for example, the central stem of a spiral staircase), your structural engineer may require that this is given additional support from below.
Building code compliance
Make sure your stair design meets building regulations. This is likely to cover not just the dimensions of the risers and goings, but also head clearance over the stair, the sizing of landings at the top and bottom of the flight, handrails and materials.
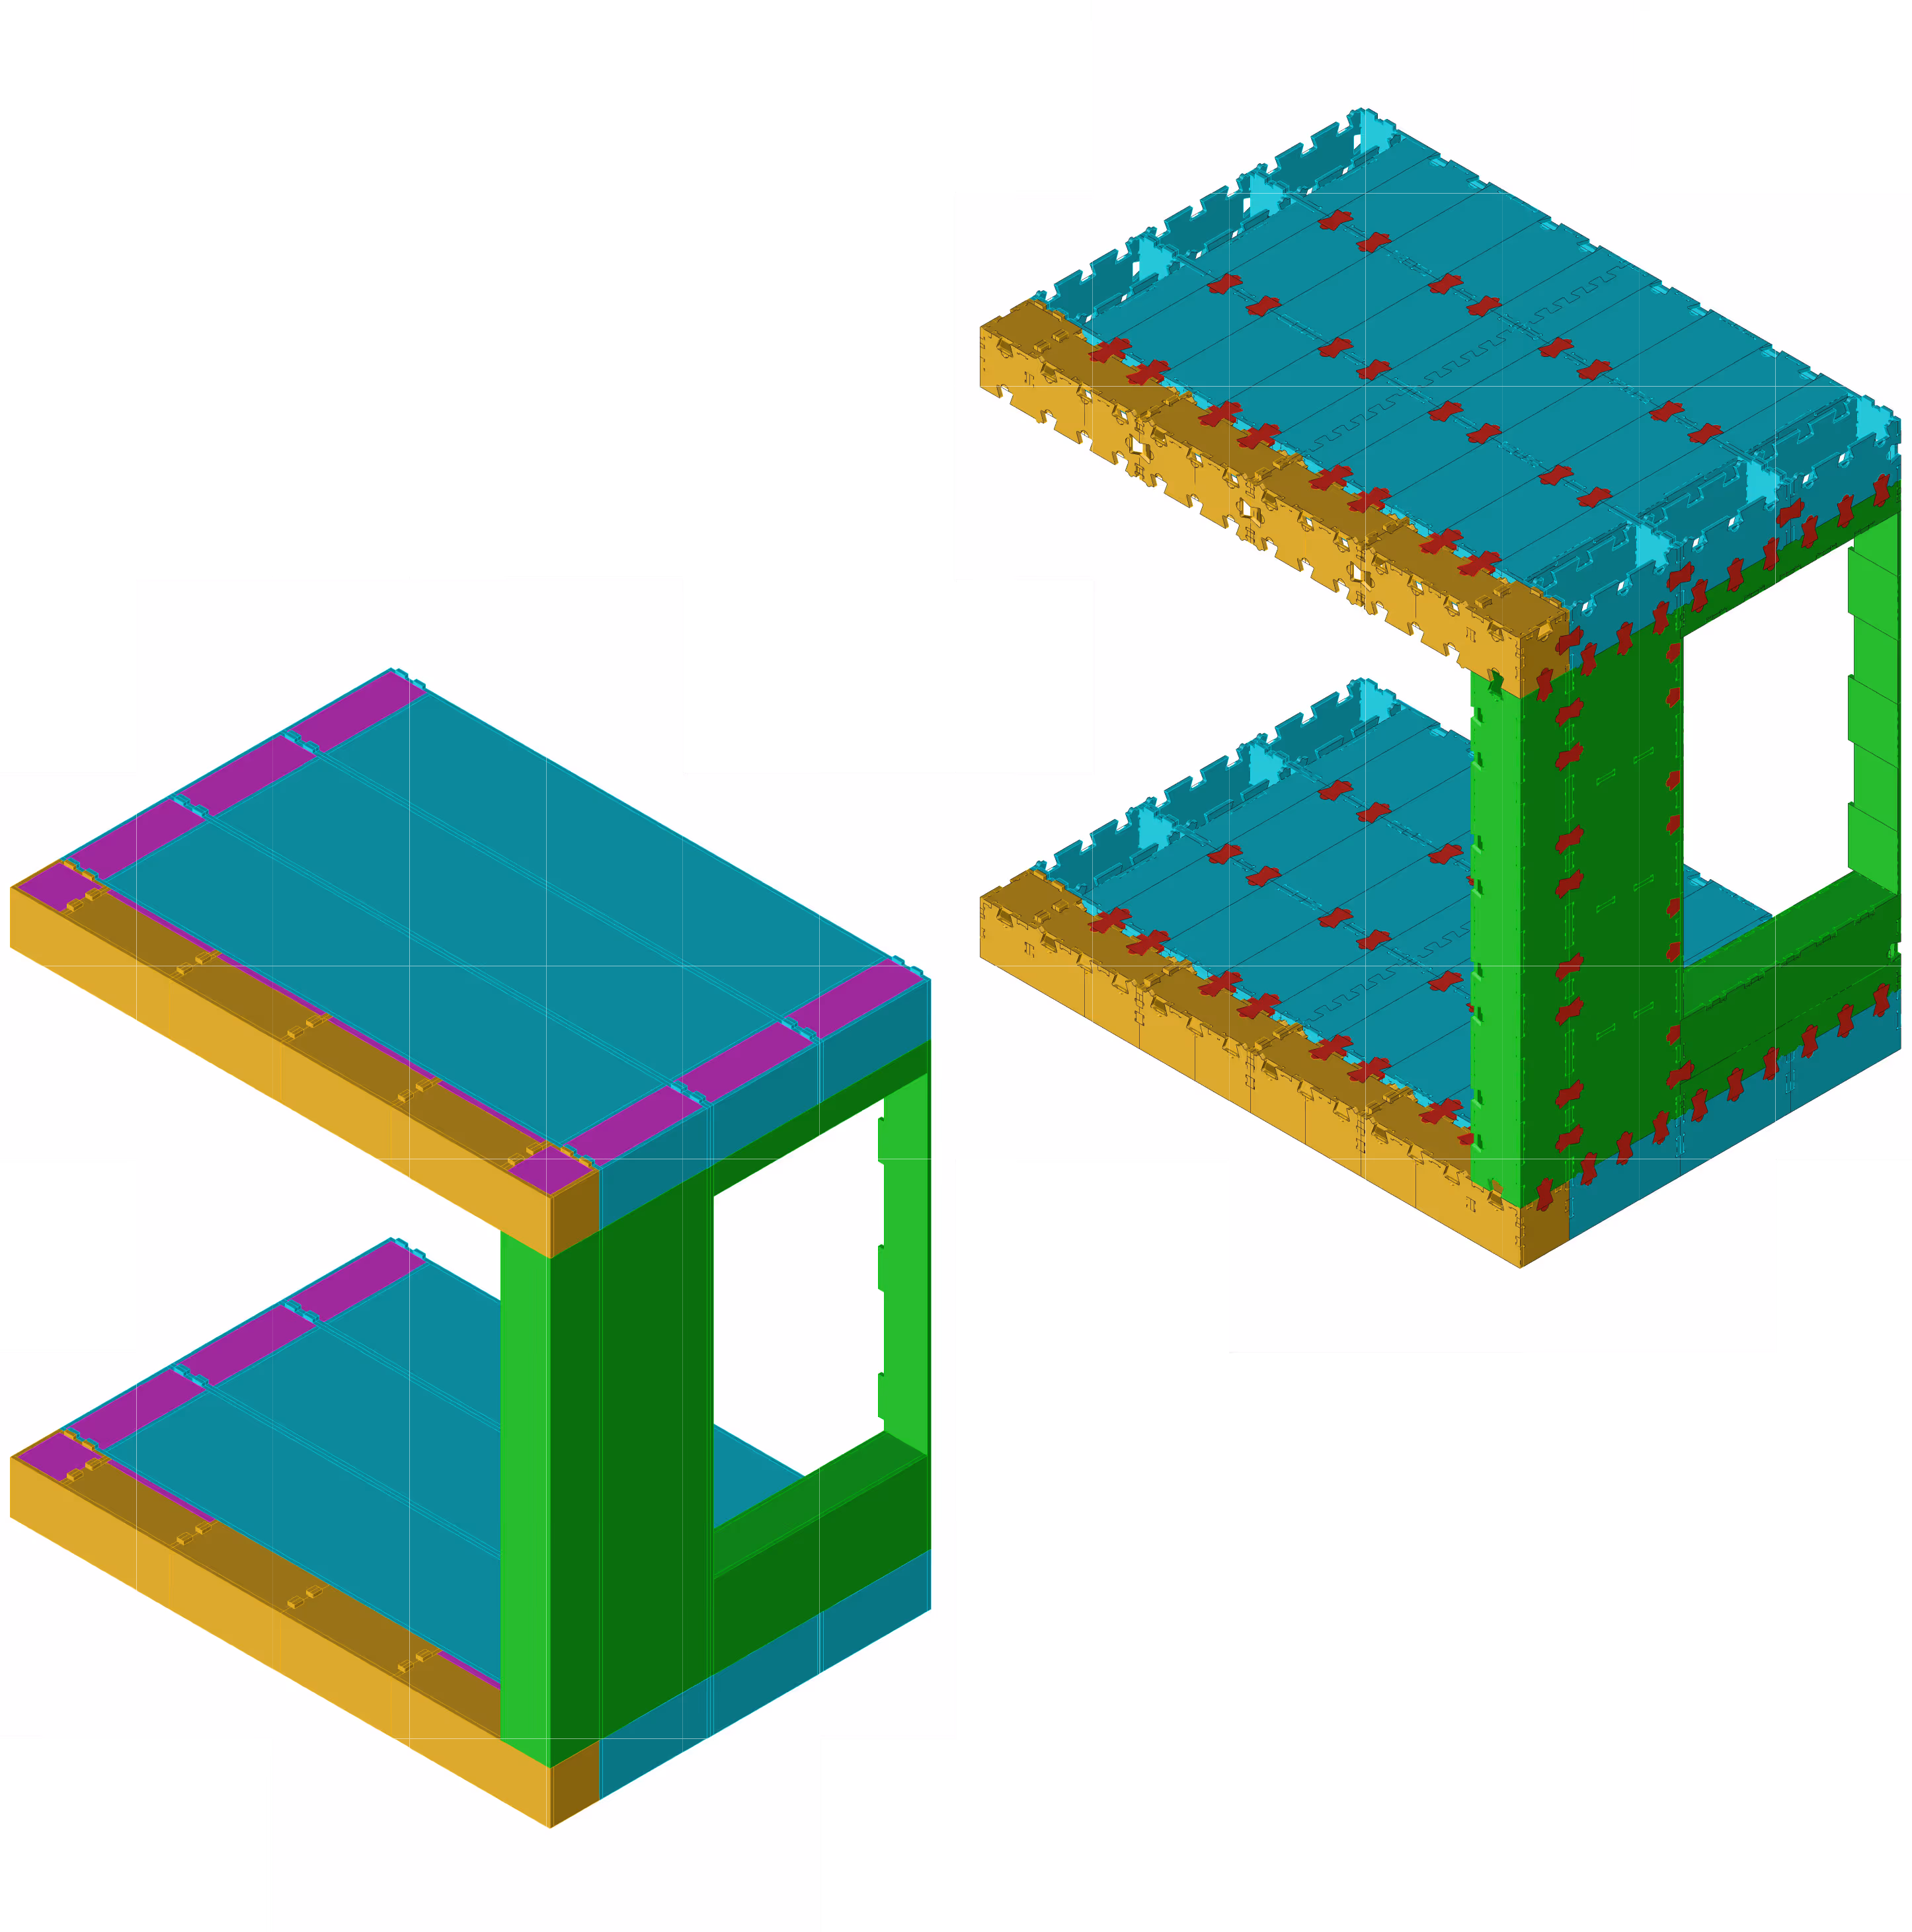
Window / Door blocks
Bowties
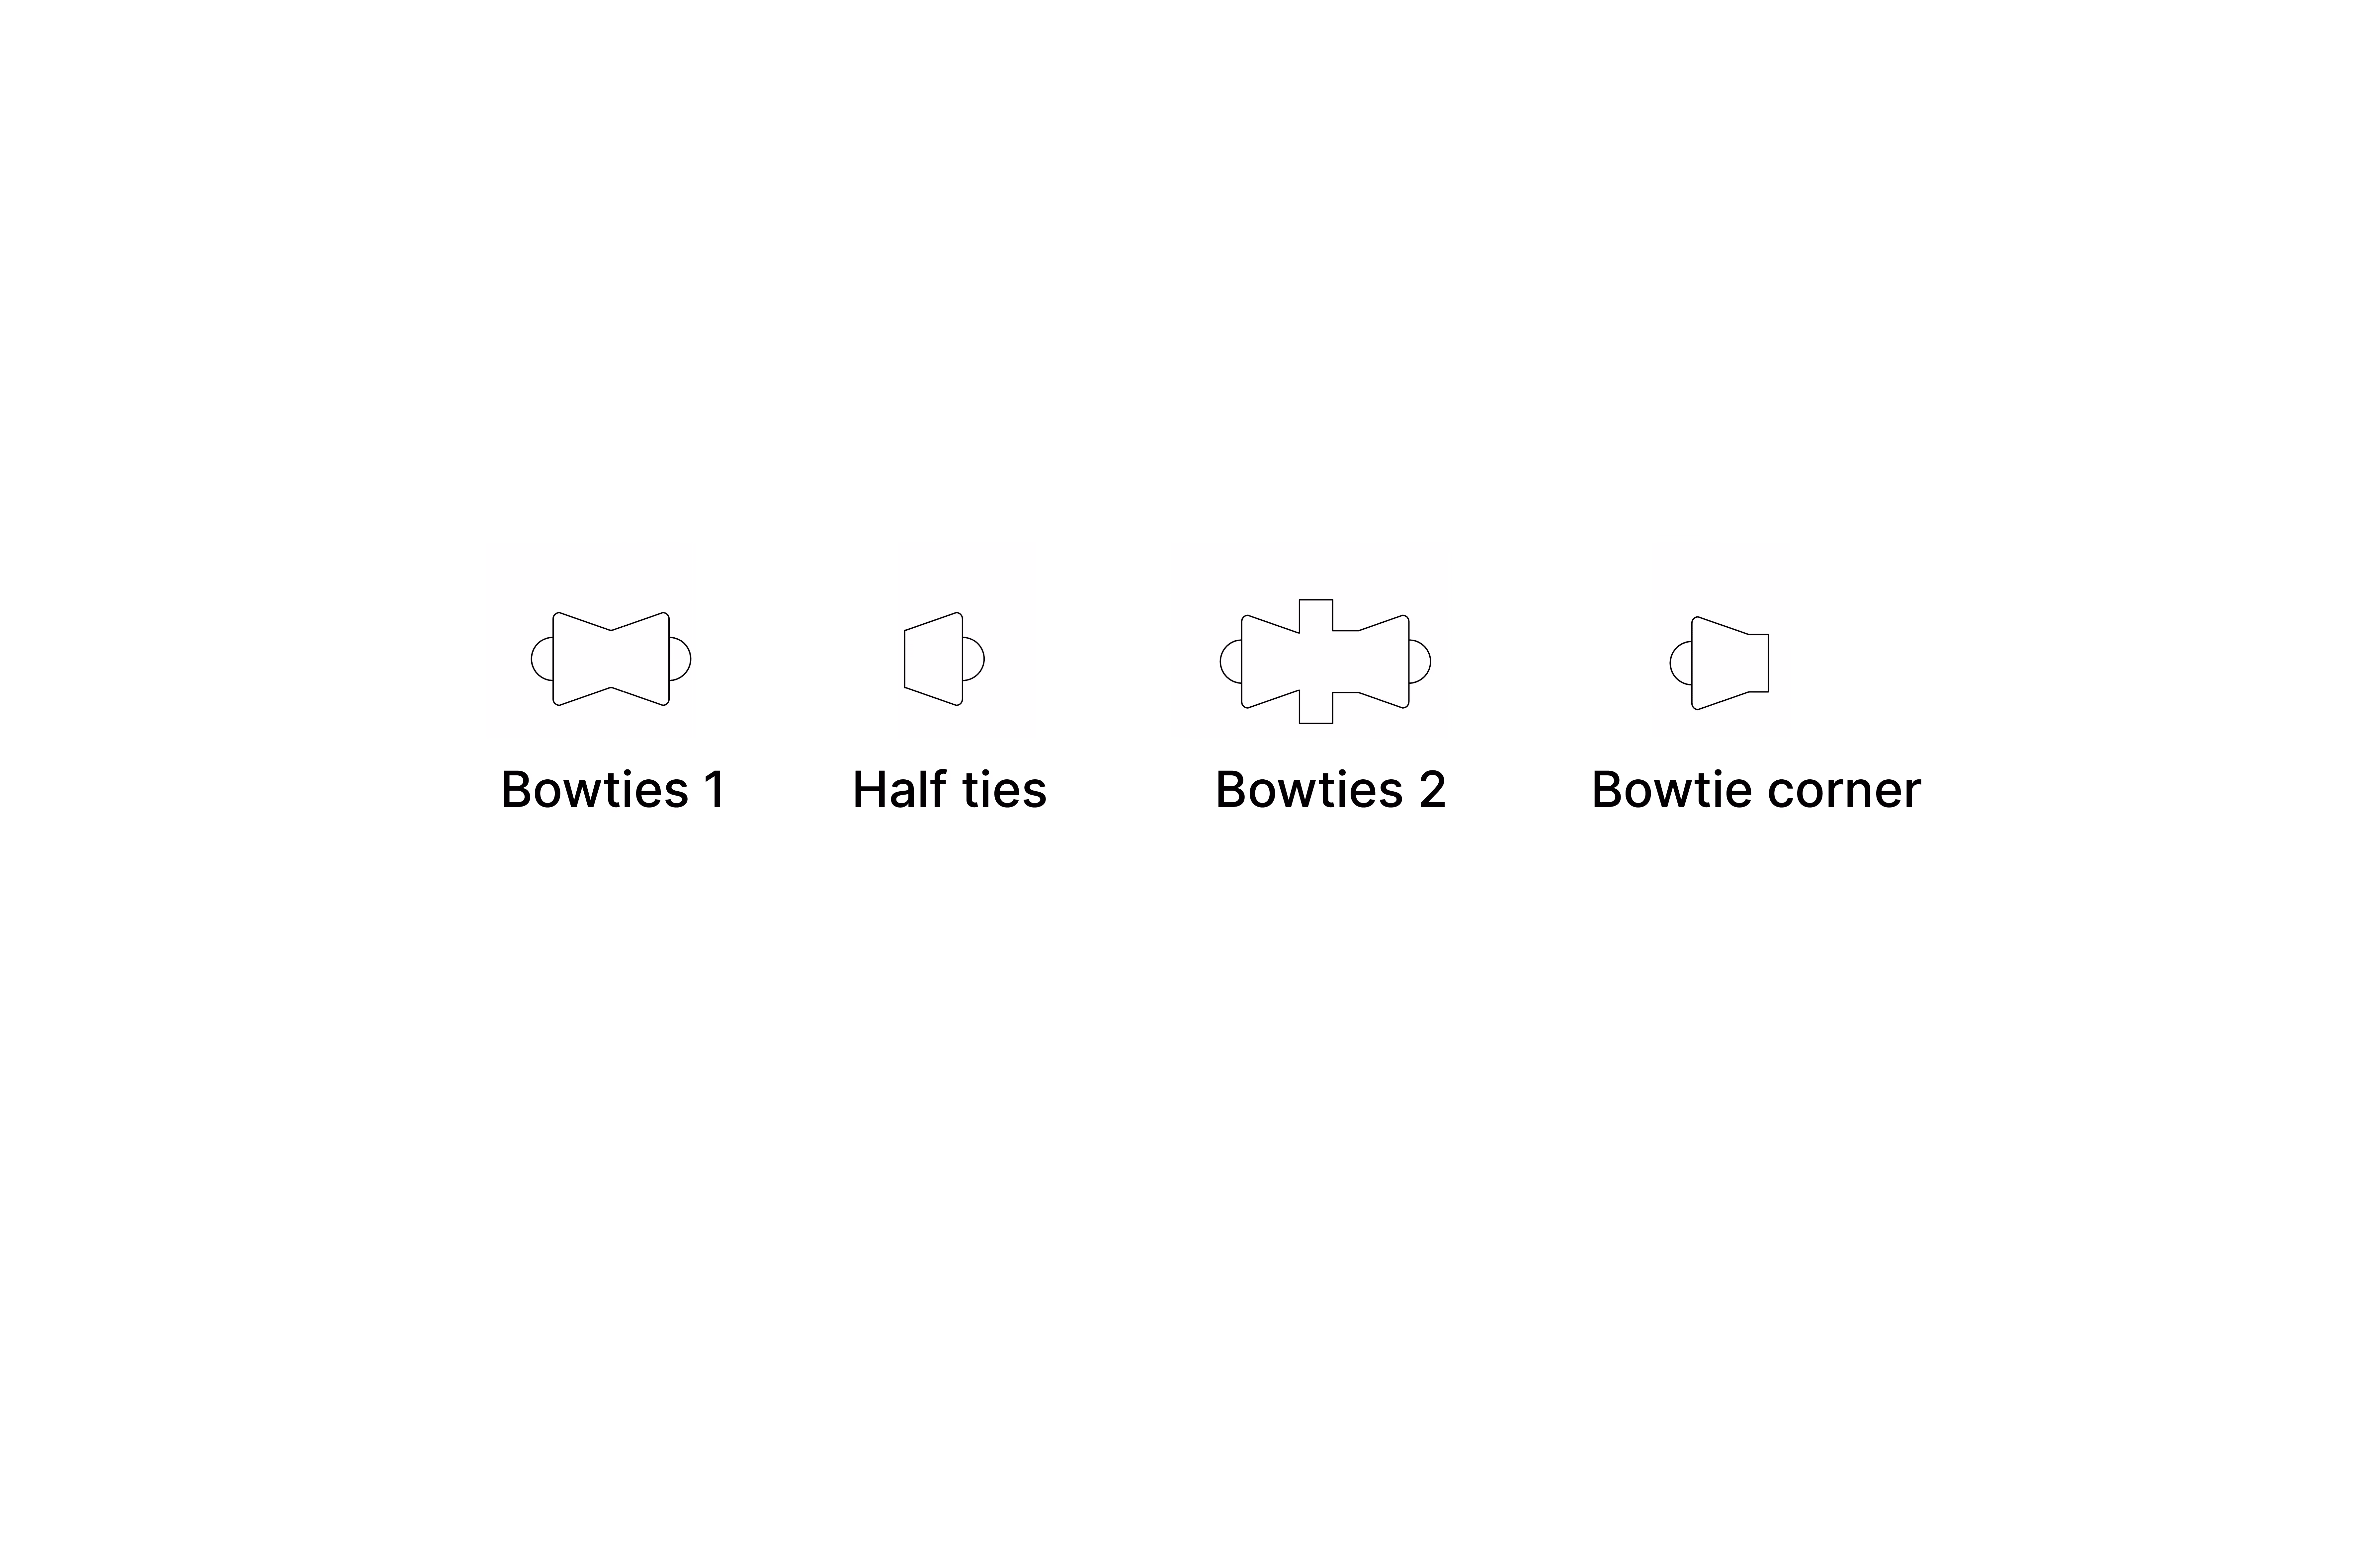
Bowties 1 are used as the main connector of parts
Half ties are used around openings
Bowties 2 connect floor blocks to end blocks
Bowtie corner pieces go into internal corners
Wall blocks
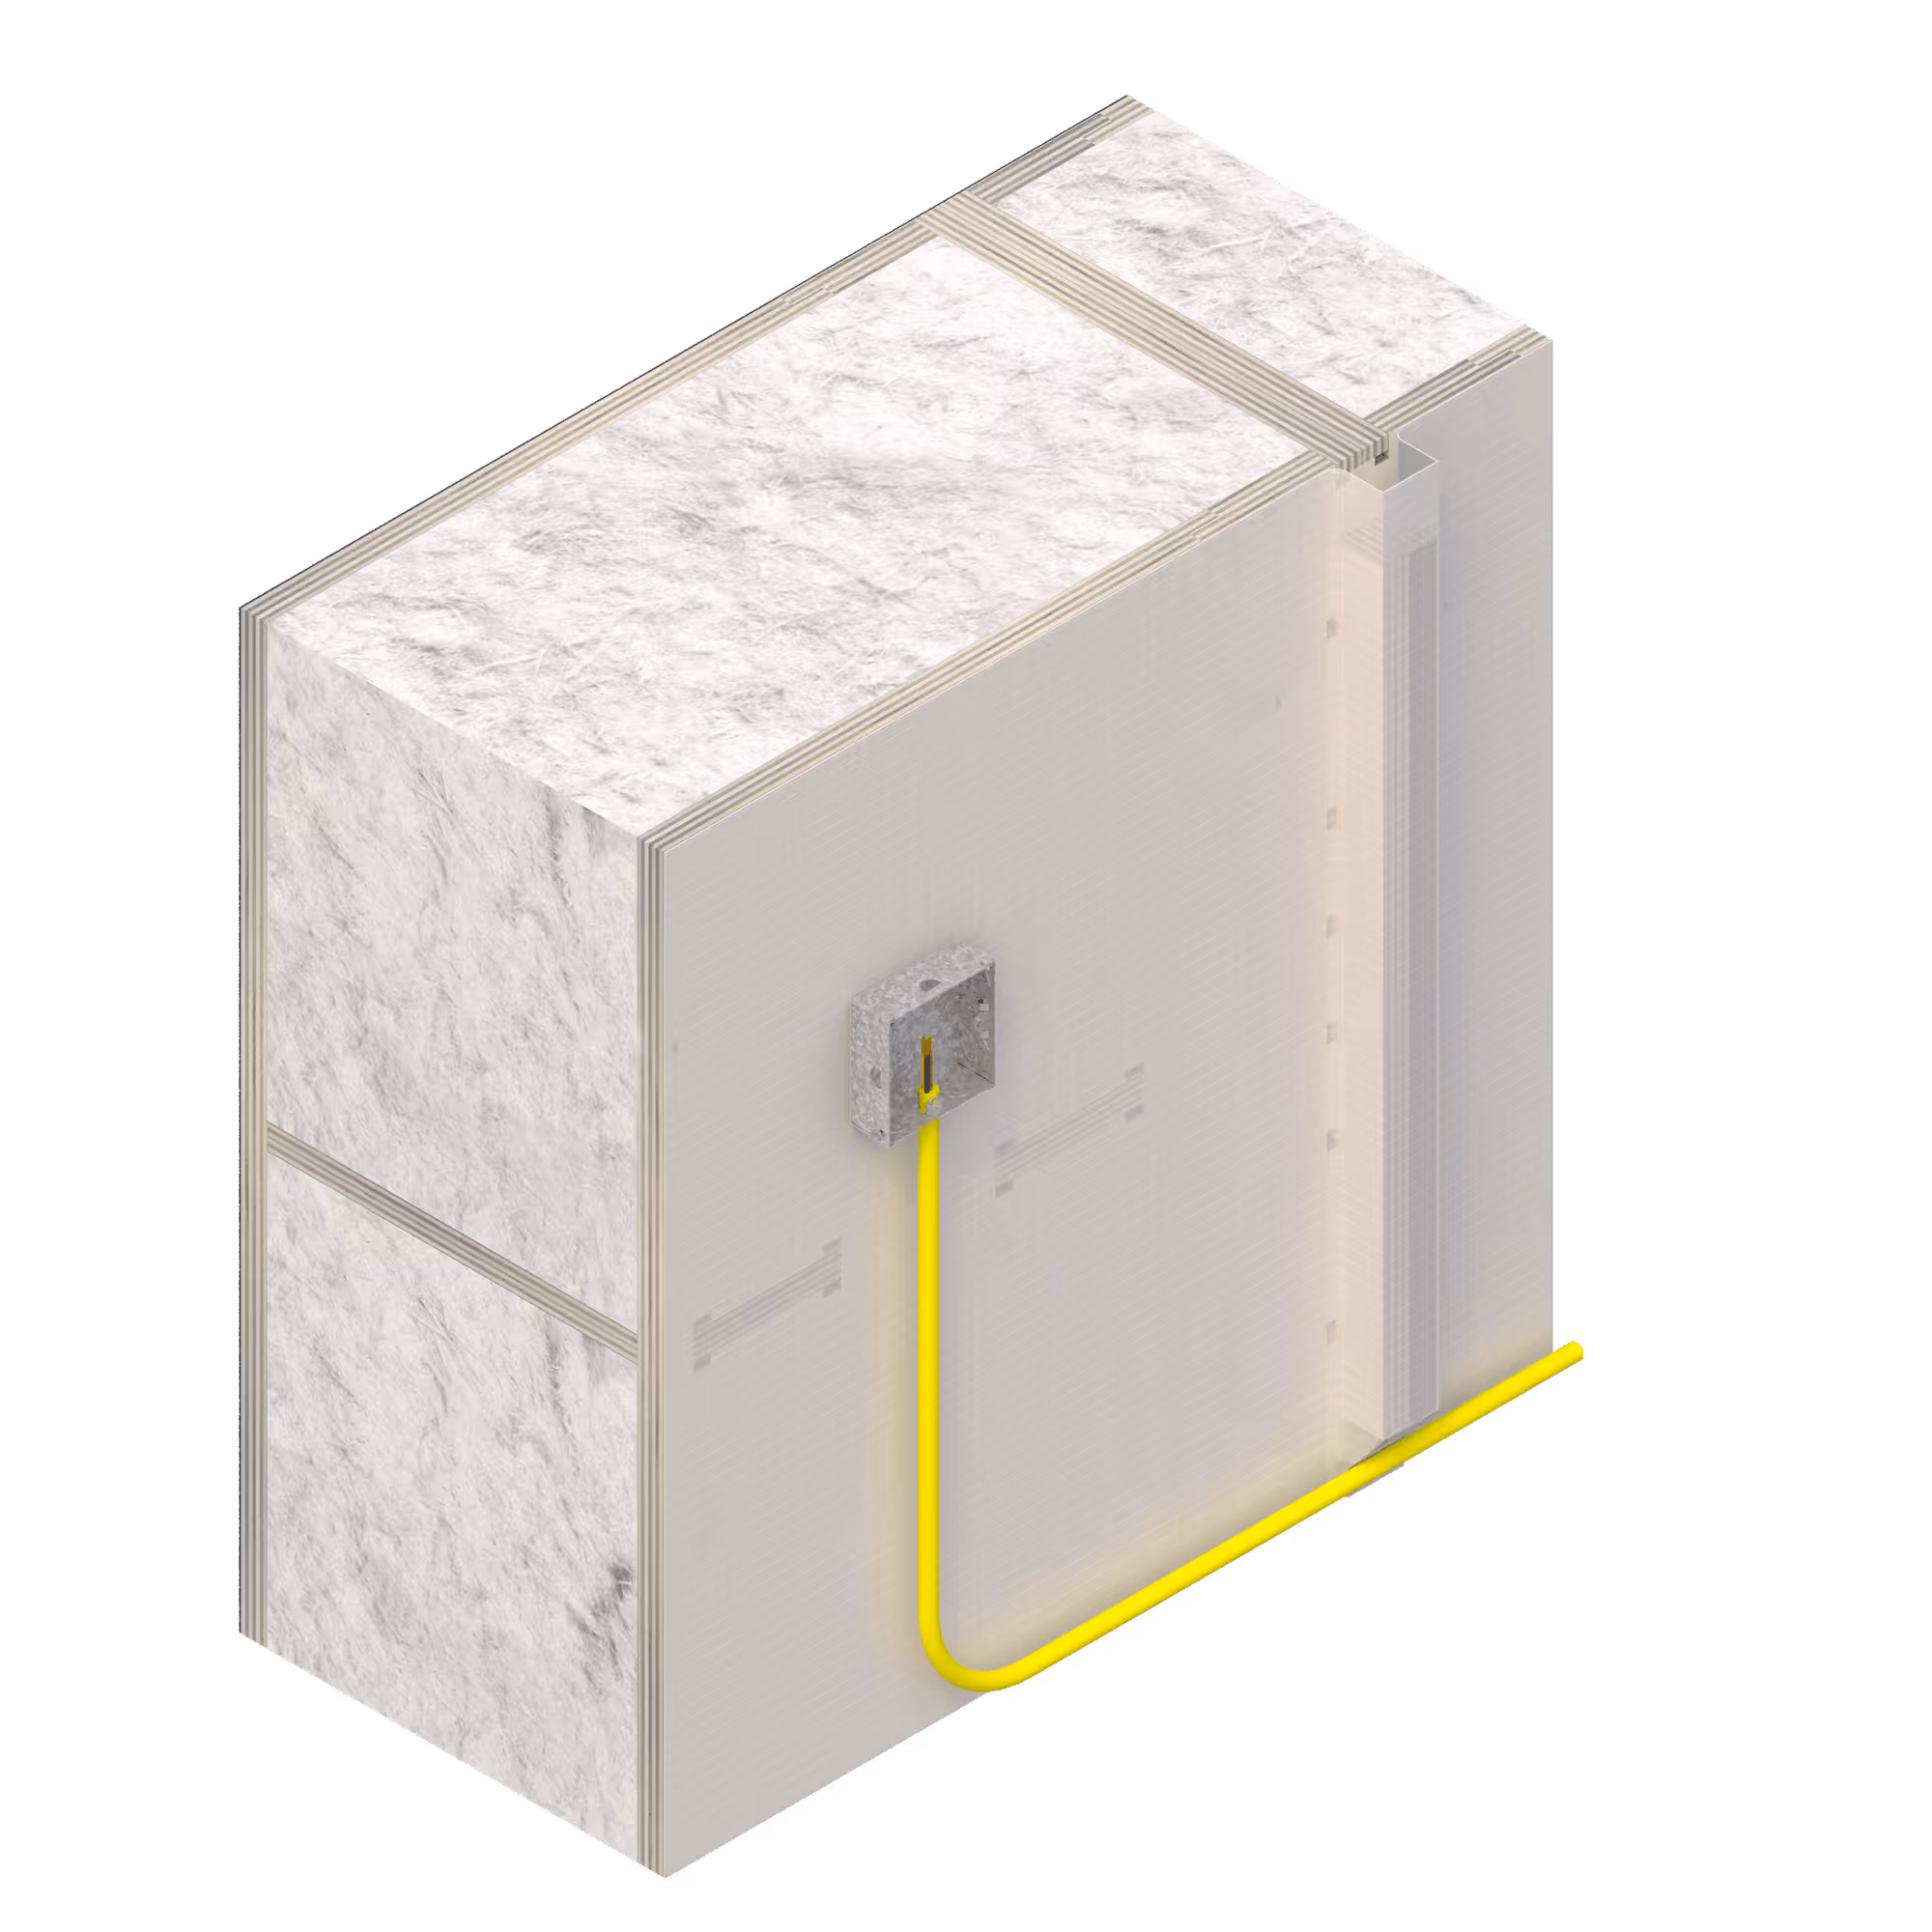
All Skylark wall and window/door blocks include a 32mm service zone internally. An internal lining of your choice can then be laid over this for a flush internal surface.
The outer face of the block is smooth and flush.
The block cavity must be completely filled with insulation material - see Insulation for more information.
Floor blocks
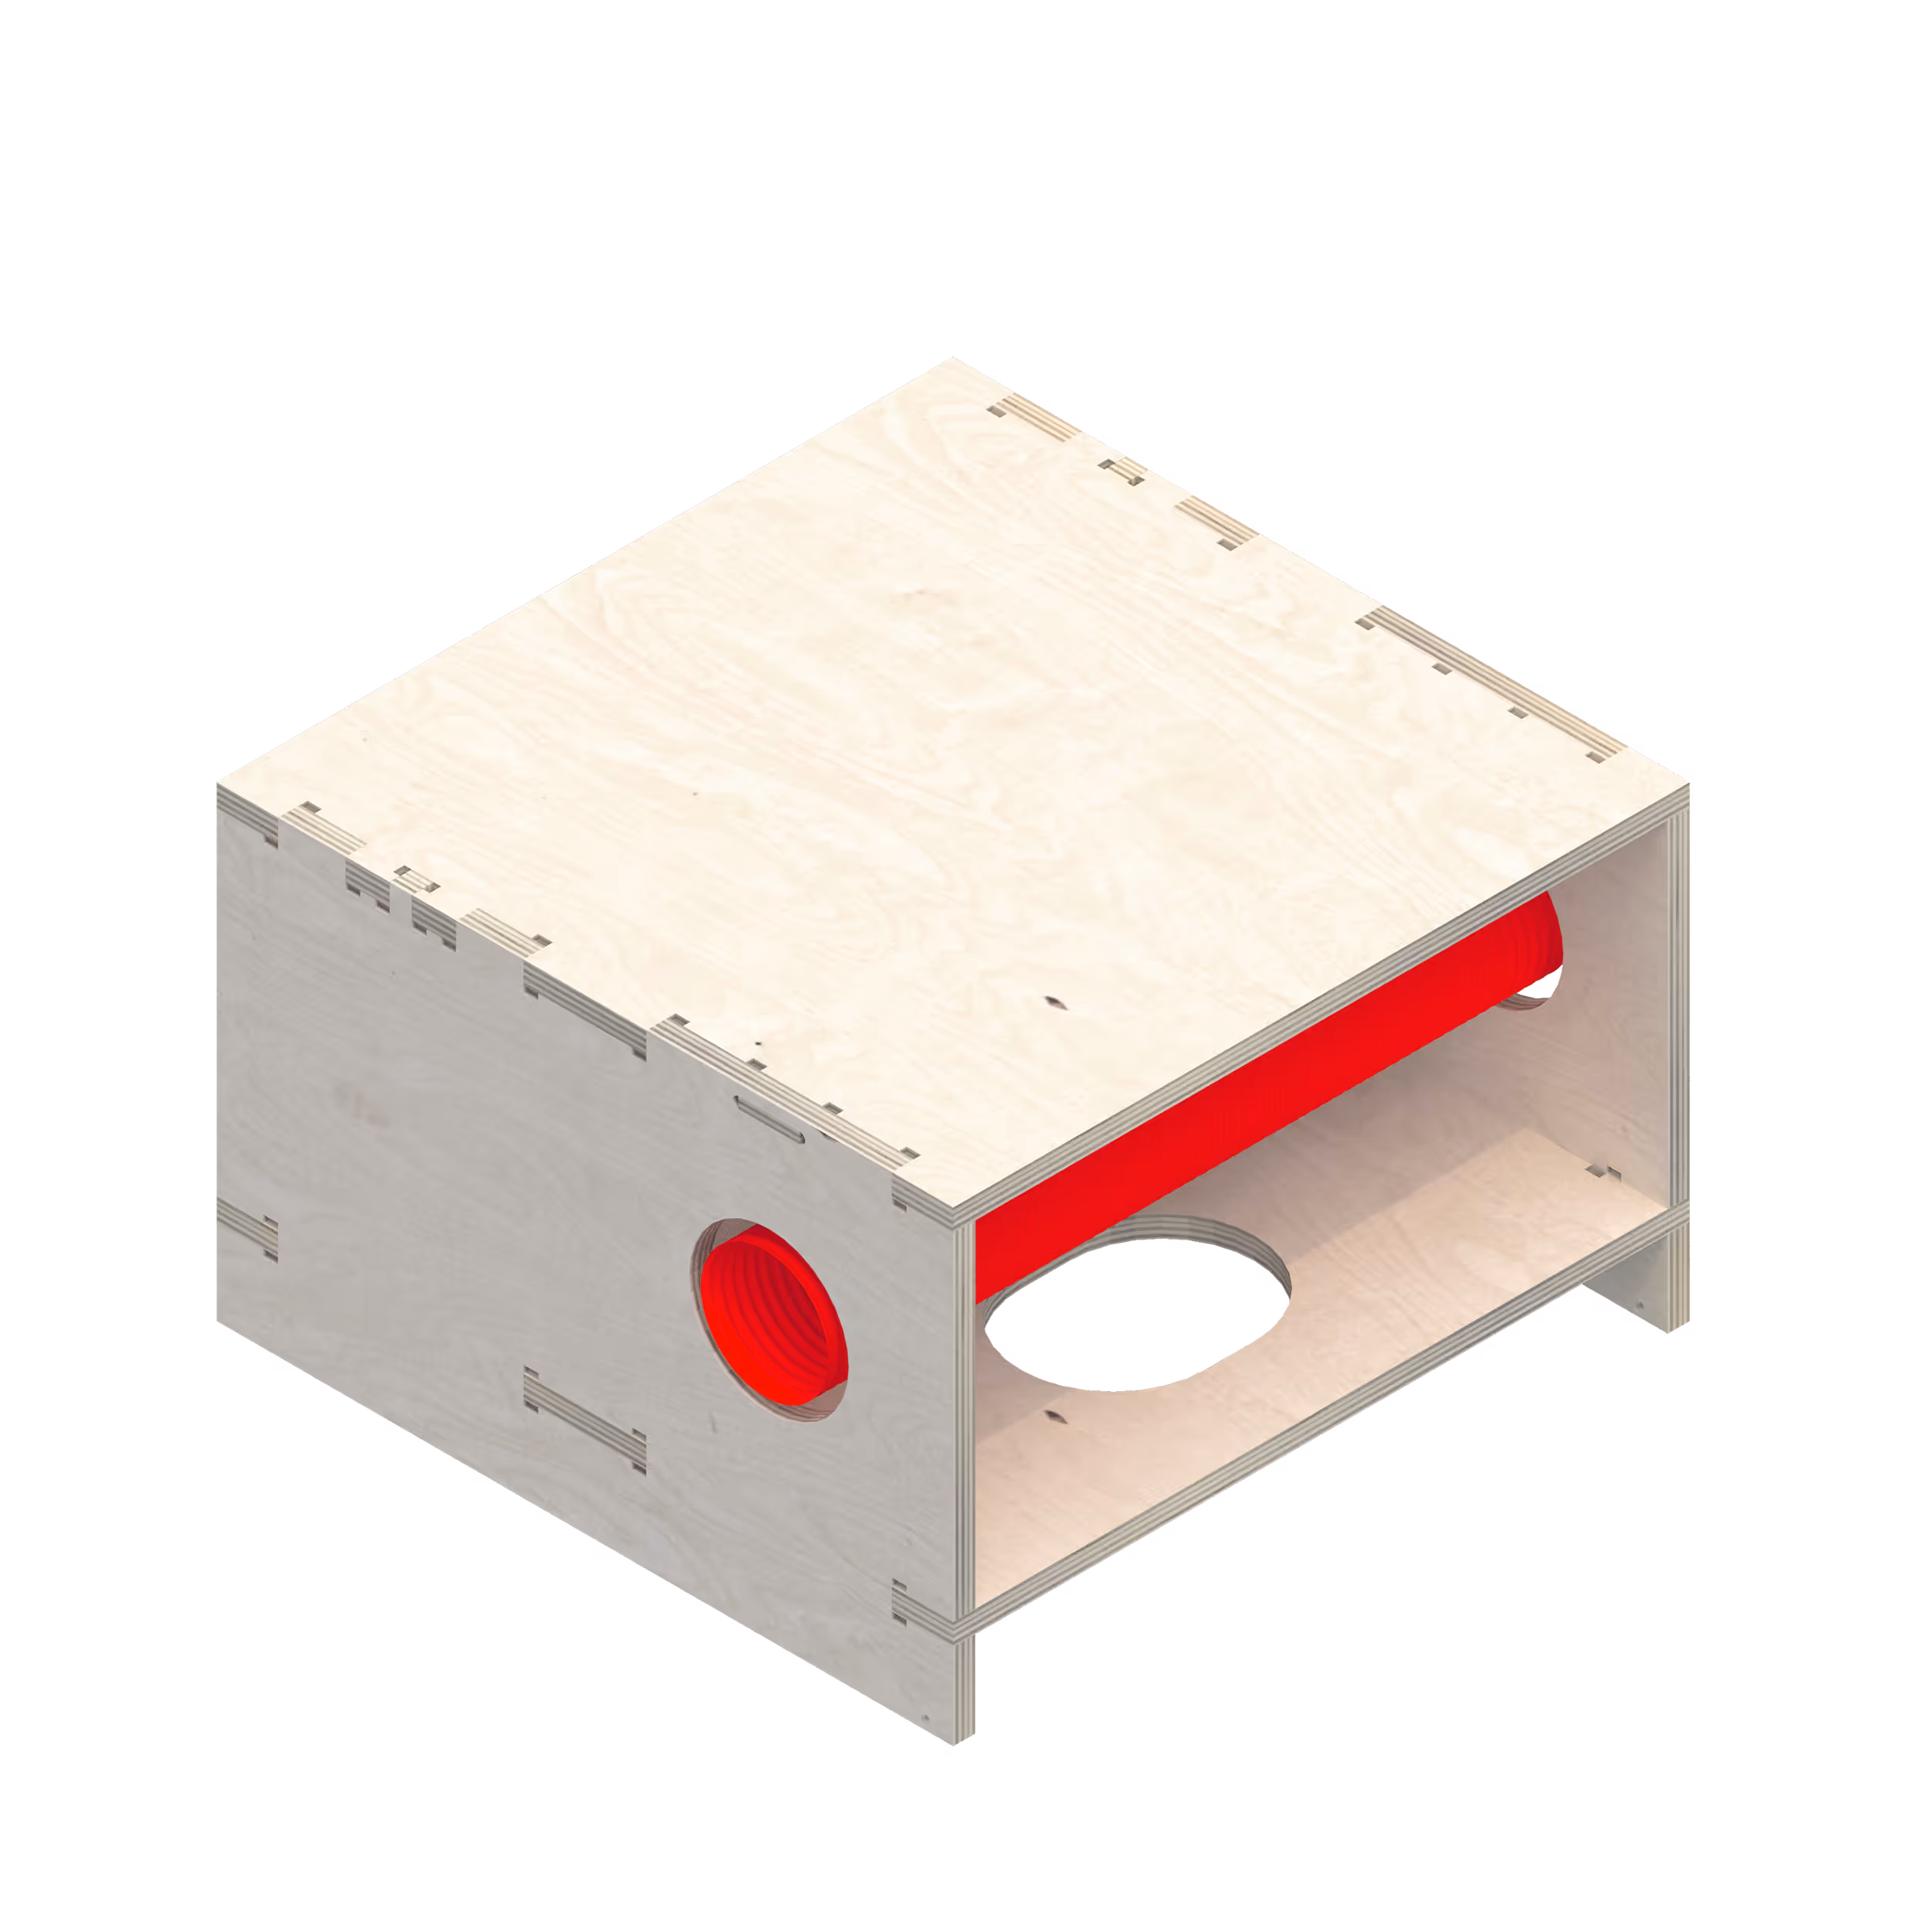
All Skylark 250 floor and roof blocks include ⌀130mm holes for ventilation ducts, and access holes in the underside of the blocks to allow you to reach through to install those ducts.
Penetrations through the WH frame can be added to your cutting files so blocks arrive on site coordinated with follow-on trades and M&E / Services strategy, or cut on site.
Roof blocks
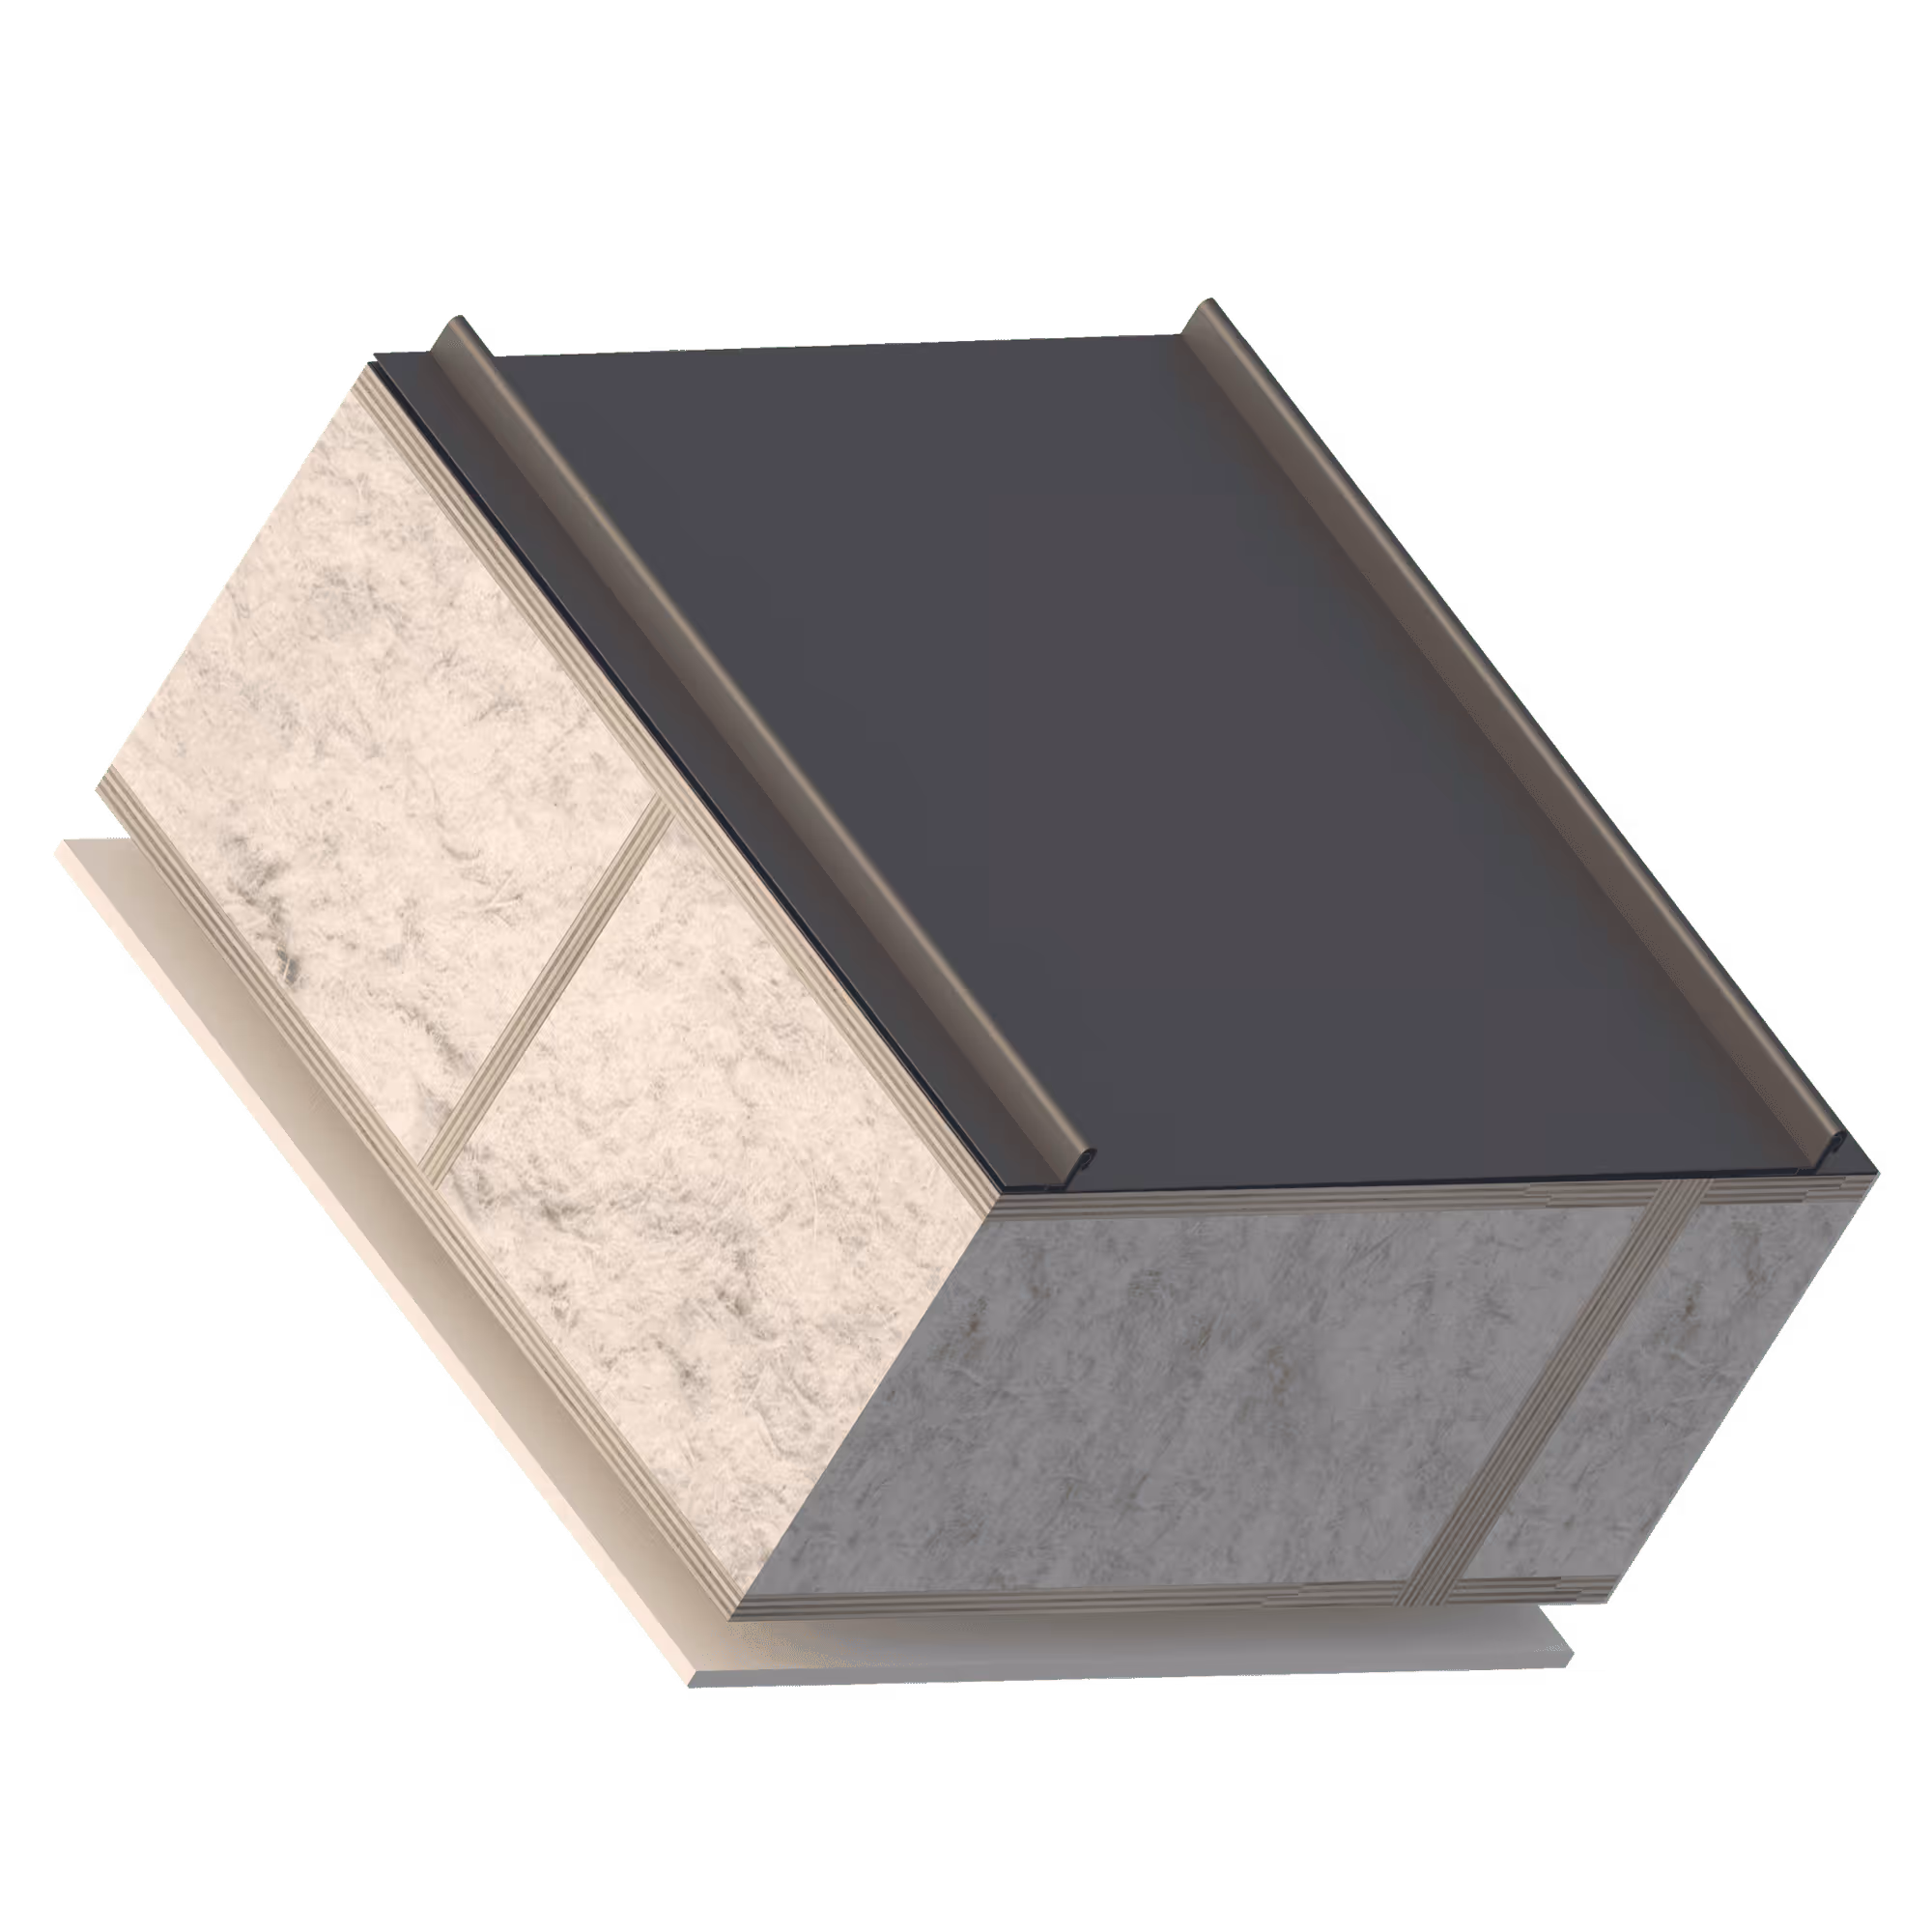
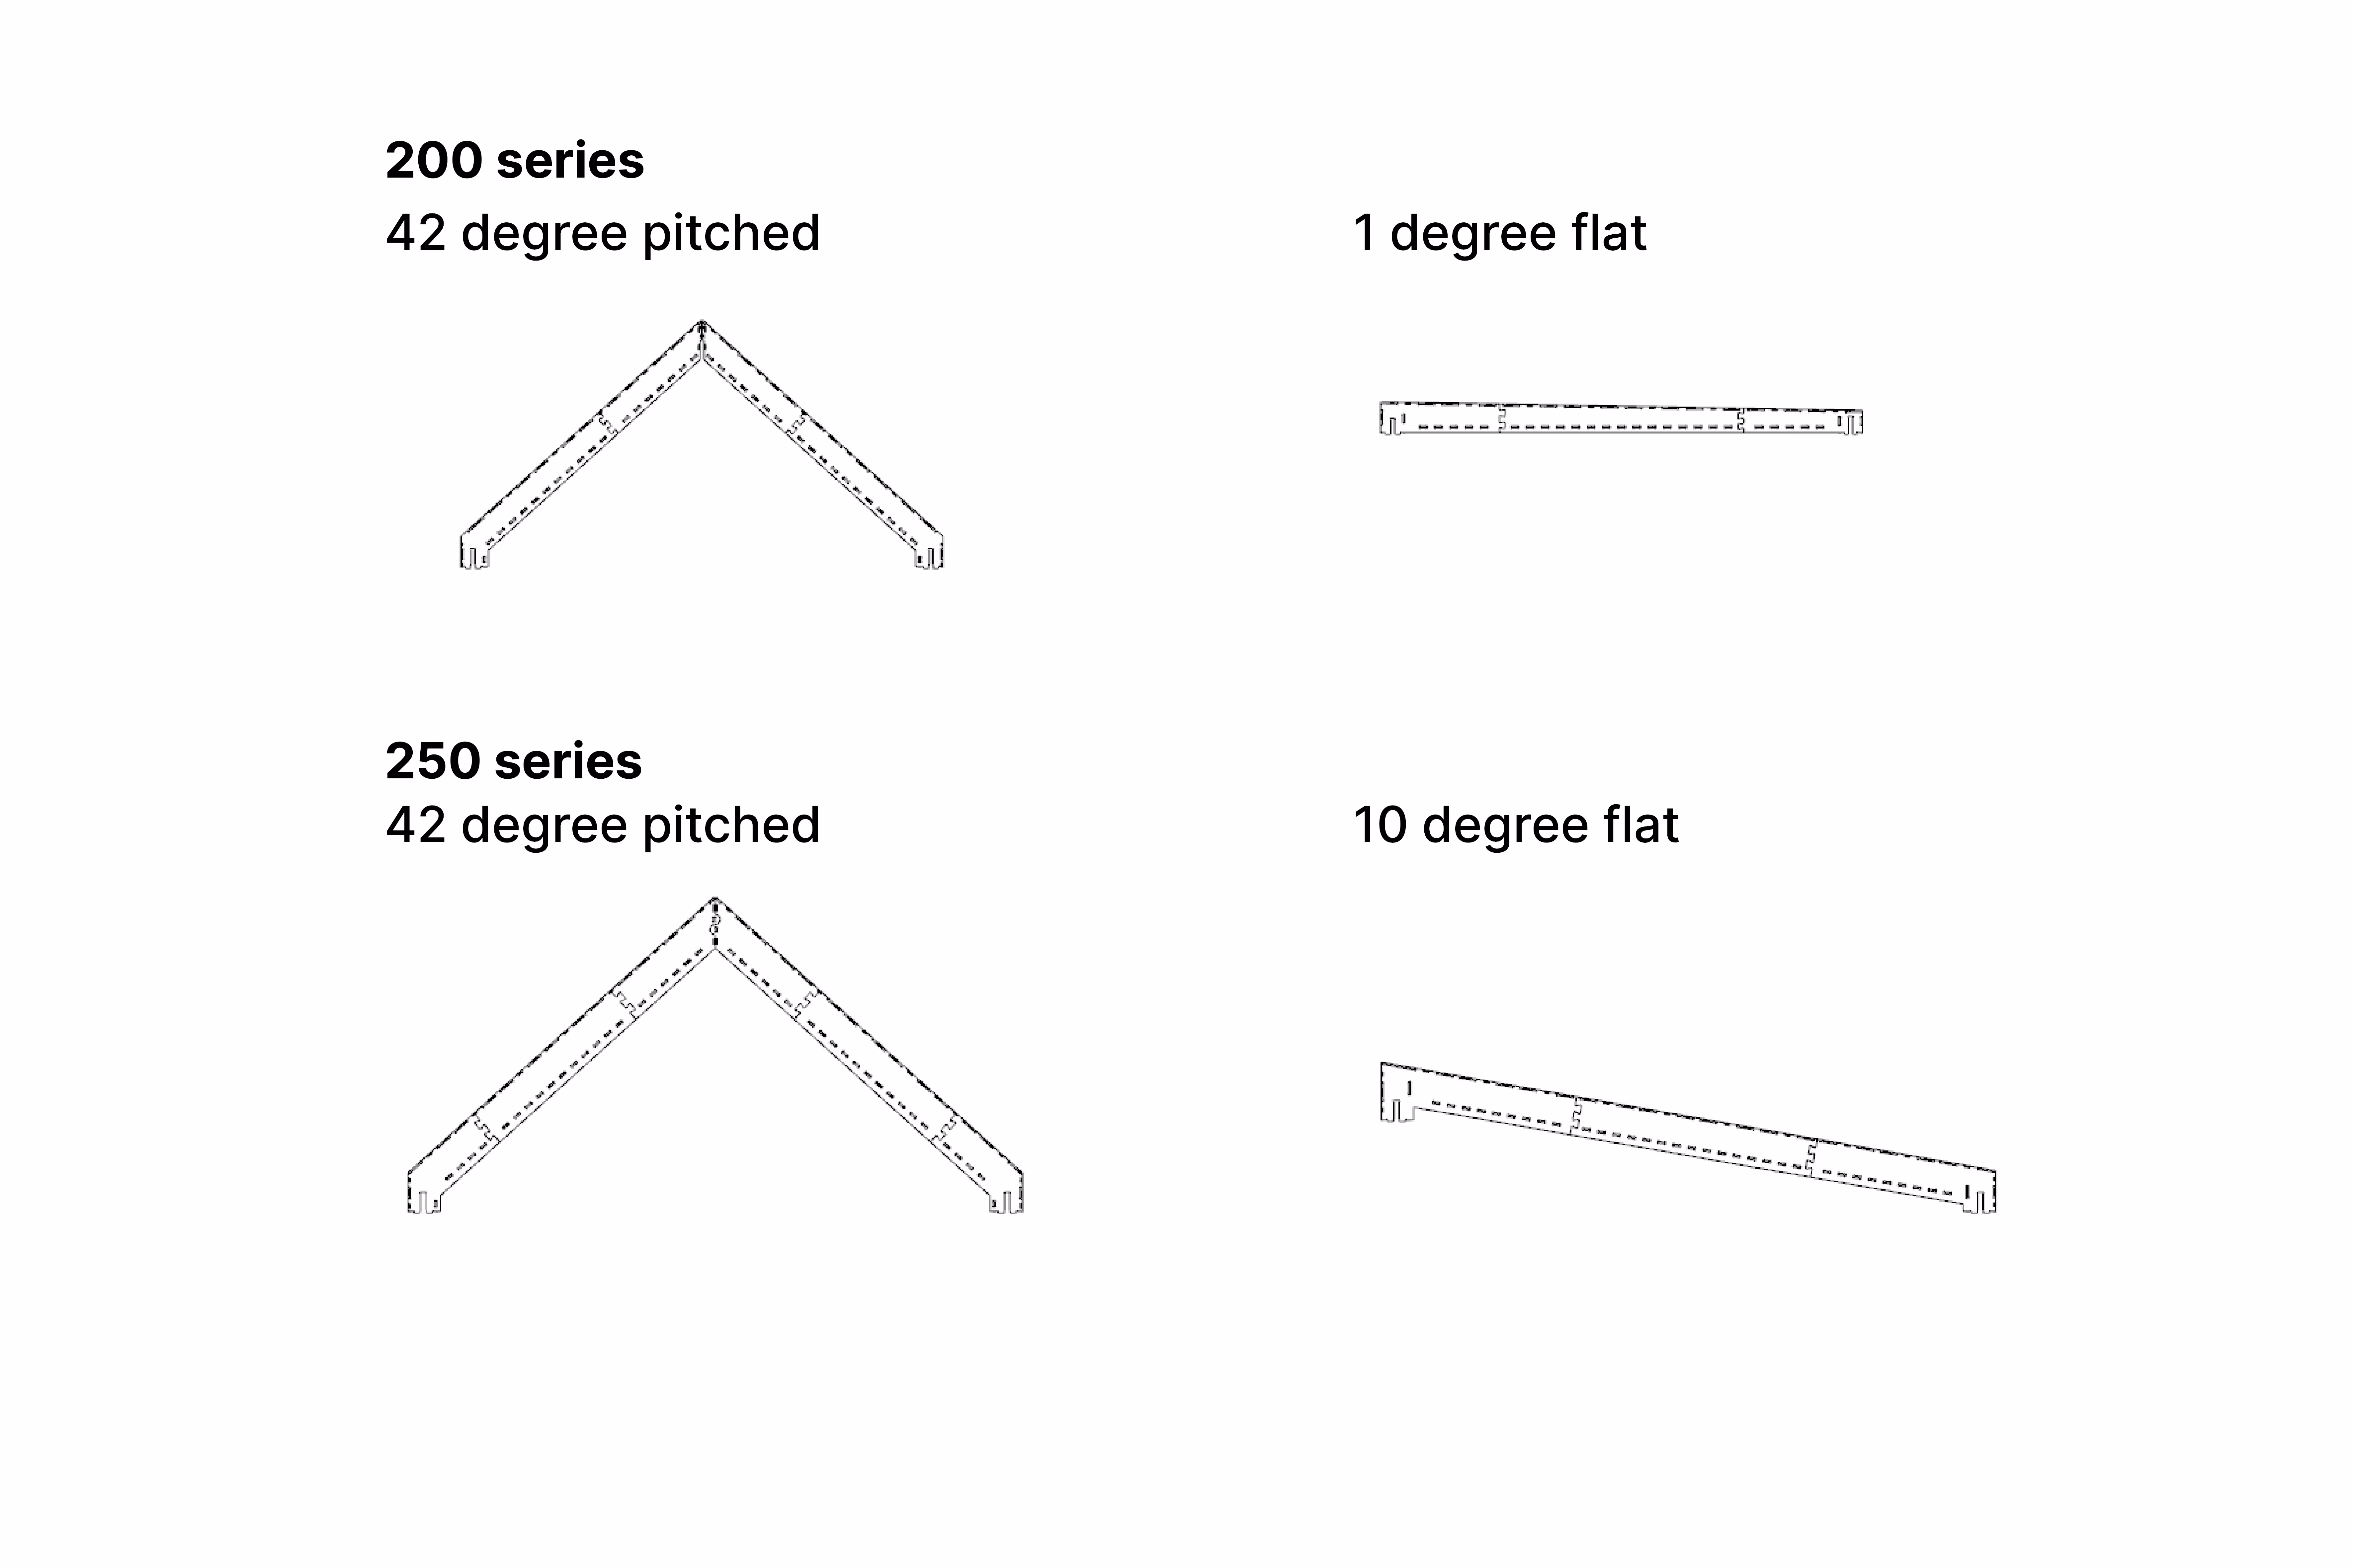
There are 2 roof type block styles to choose from - the flat roof and the apex pitched roof.
The flat roof blocks come designed with a 1 or 10 degree fall for drainage purposes
A pitched, apex roof will likely need a ridge beam to support it. The Skylark pitched roof blocks have a housing for the ridge beam to sit within. These roof blocks will then need fixing down into the ridge beam as per a Structural Engineer’s detail.
For a more traditional gable roof form, gable roof blocks are currently available for a medium (4.8m) internal span with a 42 degrees pitch. For assembly purposes, each section of roof is made from two identical parts, which can be temporarily fastened at the apex, and lifted upwards from within the building (see the general assembly guide).
To support the gable roof blocks (and to stop the walls wanting to splay outwards) a ridge beam is required. The standard 200 & 250 series roof blocks allow for a 90mm wide glulam or LVL ridge beam with an 18mm OSB or plywood packer either side. Your structural engineer will need to specify exactly what depth ridge is required depending on the internal span and the weight of the roof. If a larger ridge beam is required, the roof block can be modified to accommodate the larger member.
In some cases, it may be possible to replace a ridge beam with steel ties, but this is likely less architecturally desirable and more complex to install.
It is possible that for your roof span, a different size ridge beam will be required and the standard block can’t accommodate it. In this case, the standard roof block will need editing to fit the ridge beam.
Skylark roof blocks offer a clear service zone internally of 70mm.
Bespoke blocks
It is possible to create bespoke blocks to suit your individual project needs or design ideas. We recommend using our Chassis Design Service for this, or if you would like to make these yourself, we also offer a Chassis Check Service where we can take a look at your design and give any helpful feedback.
If you decide to create your own bespoke blocks, we recommend using the same labelling system and grouping of components as used in the standard blocks. This makes checking and editing the blocks much simpler.
Any new block designs should be checked by your Structural Engineer.
.svg)

