WikiHouse
What is WikiHouse?
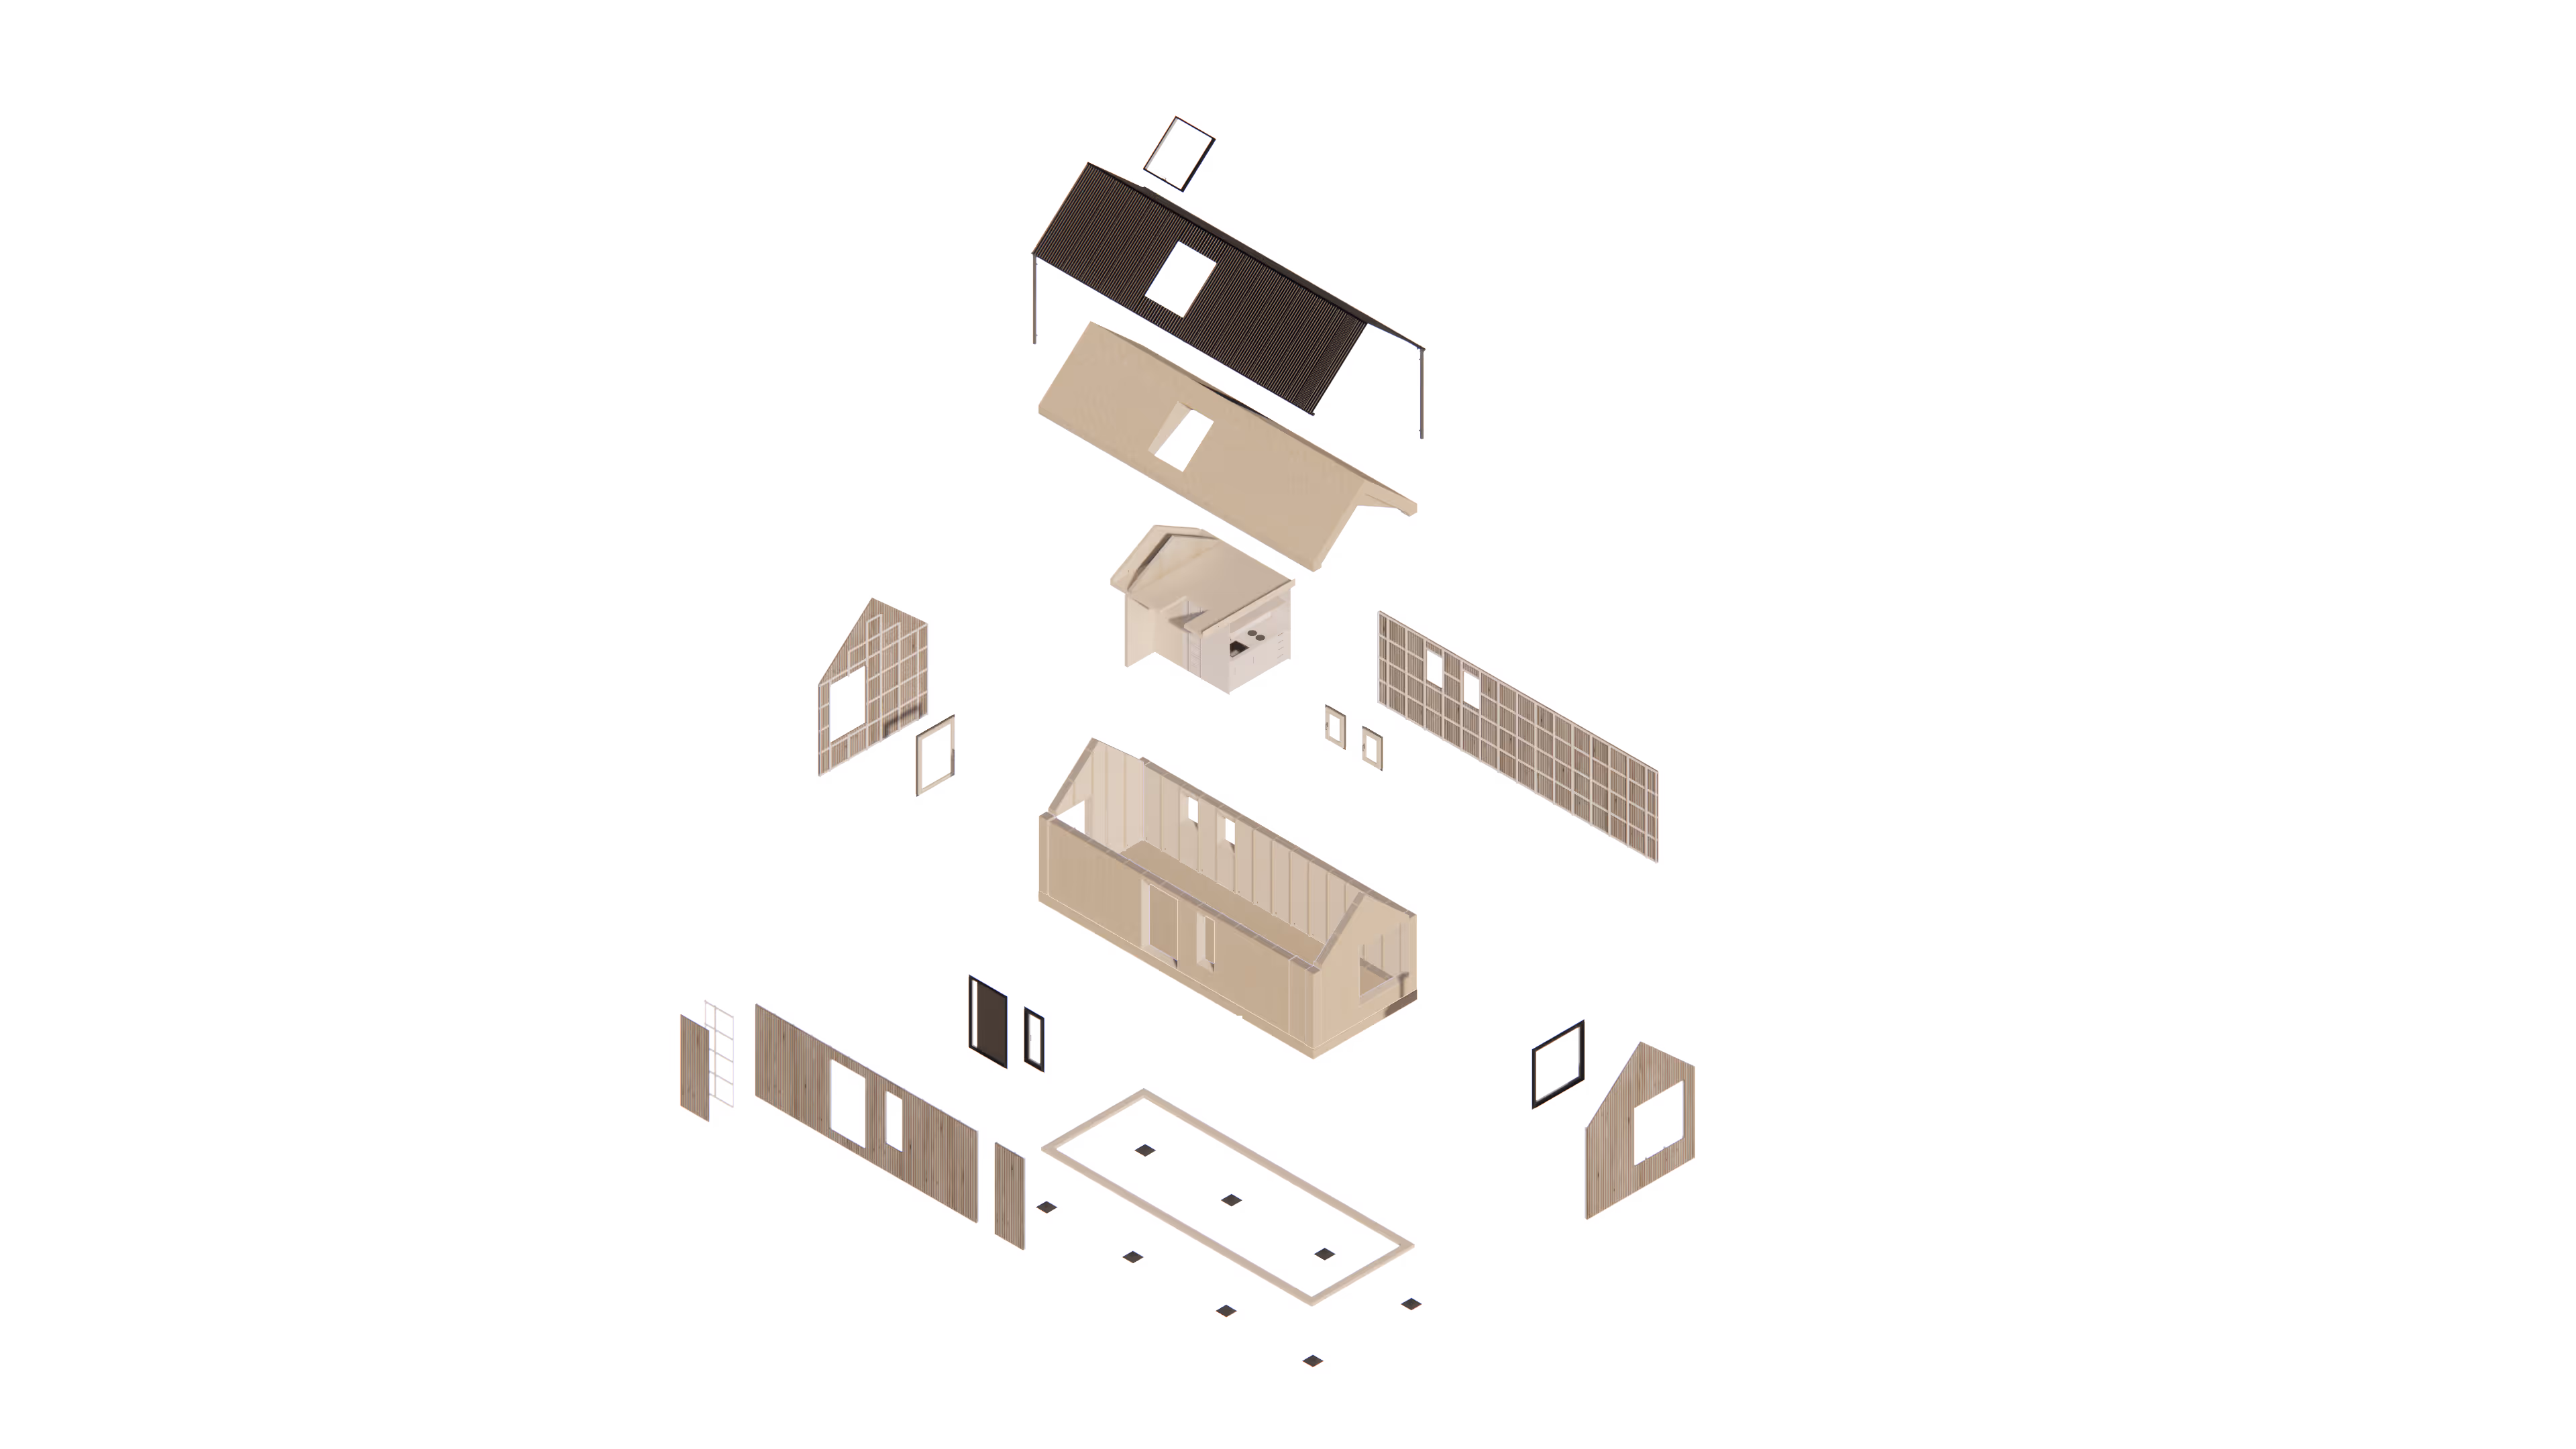
WikiHouse is a timber-based main structural framing system. WikiHouse blocks are modular and made from CNC cut sheet material - either plywood or OSB3. The blocks are zero-carbon and fully filled with insulation.
The design files for the WikiHouse blocks can be downloaded for free on our website by anyone, anywhere, via the Block Library. It is important to note that it is your own responsibility to ensure that the block system is used in a safe, responsible and regulation compliant way (see WikiHouse terms).
The latest version of WikiHouse is called ‘Skylark’, and is designed as a cassette system with all timber connections and rapid to assemble. Skylark comes in two series - Skylark200 and Skylark250. The 200 series is a slimmer and lighter version for smaller structures, and 250 is for more substantial builds that require higher thermal and structural performance. More information on the two system types is in Designing for WikiHouse.
Is WikiHouse for me?
WikiHouse is suitable for most project types, but not everything. Please refer to the section where & when to use WikiHouse for more detail.
What’s not included with WikiHouse
Everything outside the WikiHouse chassis is up to you or your designer to decide and determine. If you would like help with factors such as regulation compliance, coordination of consultant information, management of health and safety information etc. we can recommend an expert from our network to you who will be able to offer support & guidance.
You might need an appointed Designer
There are many possibilities for how your WikiHouse design might look.
We can help you to find an expert designer from our network to guide you through all the necessary steps and ensure your project is regulation compliant & fully coordinated. Our network of providers should cater to all project types, and can support your project if it is going to be built by you, or if you prefer a more hands-off approach to design and construction.
Here at WikiHouse, we are on hand for advice related to your Skylark structure, and when you’re ready, we can create your detailed chassis model including any bespoke features, corresponding cutting files for manufacture and a step-by-step assembly guide. We can also check your own 3D structural chassis model if you prefer to make this yourself. Head over to our services page when you’re ready!
You’re likely to need an appointed Structural Engineer
WikiHouse frames should be checked by a qualified Structural Engineer. The structural engineer will be responsible for ensuring that the WikiHouse chassis is structurally designed for the specific local conditions and regulations, and for providing a structural engineering report. We can help you find an experienced consultant from our providers network, or inform your local consultant about our guidance for Structural Engineers, which they can use to understand and check your design.
For straightforward, smaller structures using only the standard Skylark blocks, we’ve partnered with some UK Structural Engineers to offer a ‘Fast Track Engineering Service’, which is targeted to offer a consultancy service for lower fees and a simpler turnaround for structural sign-off.
.svg)

